Module 1 - Lab 1 : Access the Sunstone Graphical UI
Table of Contents
Expand to access the In-page navigation
Objective(-s):
- Install the opennebula-form package and inspect the running systemd services.
- Locate the one_auth file and extract the password.
- Login to the Sunstone UI as oneadmin.
- Enroll the Private Key.
Install the opennebula-form package and inspect the running systemd services.
1.1.1
Connect to Node 1’s using your Frontend FQDN (lab-X.opennebula.academy) with user gateway.
Install the package and start it:
sudo apt install opennebula-form -y
sudo systemctl enable --now opennebula-form
Look at the OpenNebula services:
systemctl | grep opennebula
    opennebula-fireedge.service            loaded    active running   OpenNebula FireEdge Server
    opennebula-flow.service                loaded    active running   OpenNebula Flow Service
    opennebula-form.service                loaded    active running   OpenNebula Form Service
    opennebula-gate.service                loaded    active running   OpenNebula Gate Service
    opennebula-guacd.service               loaded    active running   OpenNebula Guacamole Server
    opennebula-hem.service                 loaded    active running   OpenNebula Hook Execution Service
    opennebula-ssh-agent.service           loaded    active running   OpenNebula SSH agent
    opennebula.service                     loaded    active running   OpenNebula Cloud Controller Daemon
    opennebula-showback.timer              loaded    active waiting   OpenNebula's periodic showback calculation
    opennebula-ssh-socks-cleaner.timer     loaded    active waiting   OpenNebula SSH persistent connection cleaner
Locate the one_auth file and extract the password.
1.1.3
Print the contents of the one_auth file:
cat ~/.one/one_auth
The “:” acts as a separator. Note the string on the right of the separator. Note that your value is going to be different:
oneadmin:Pa$$w0rd
1.1.3
Open the Sunstone UI and login using the credentials (substitute X with your Lab ID and hit enter).
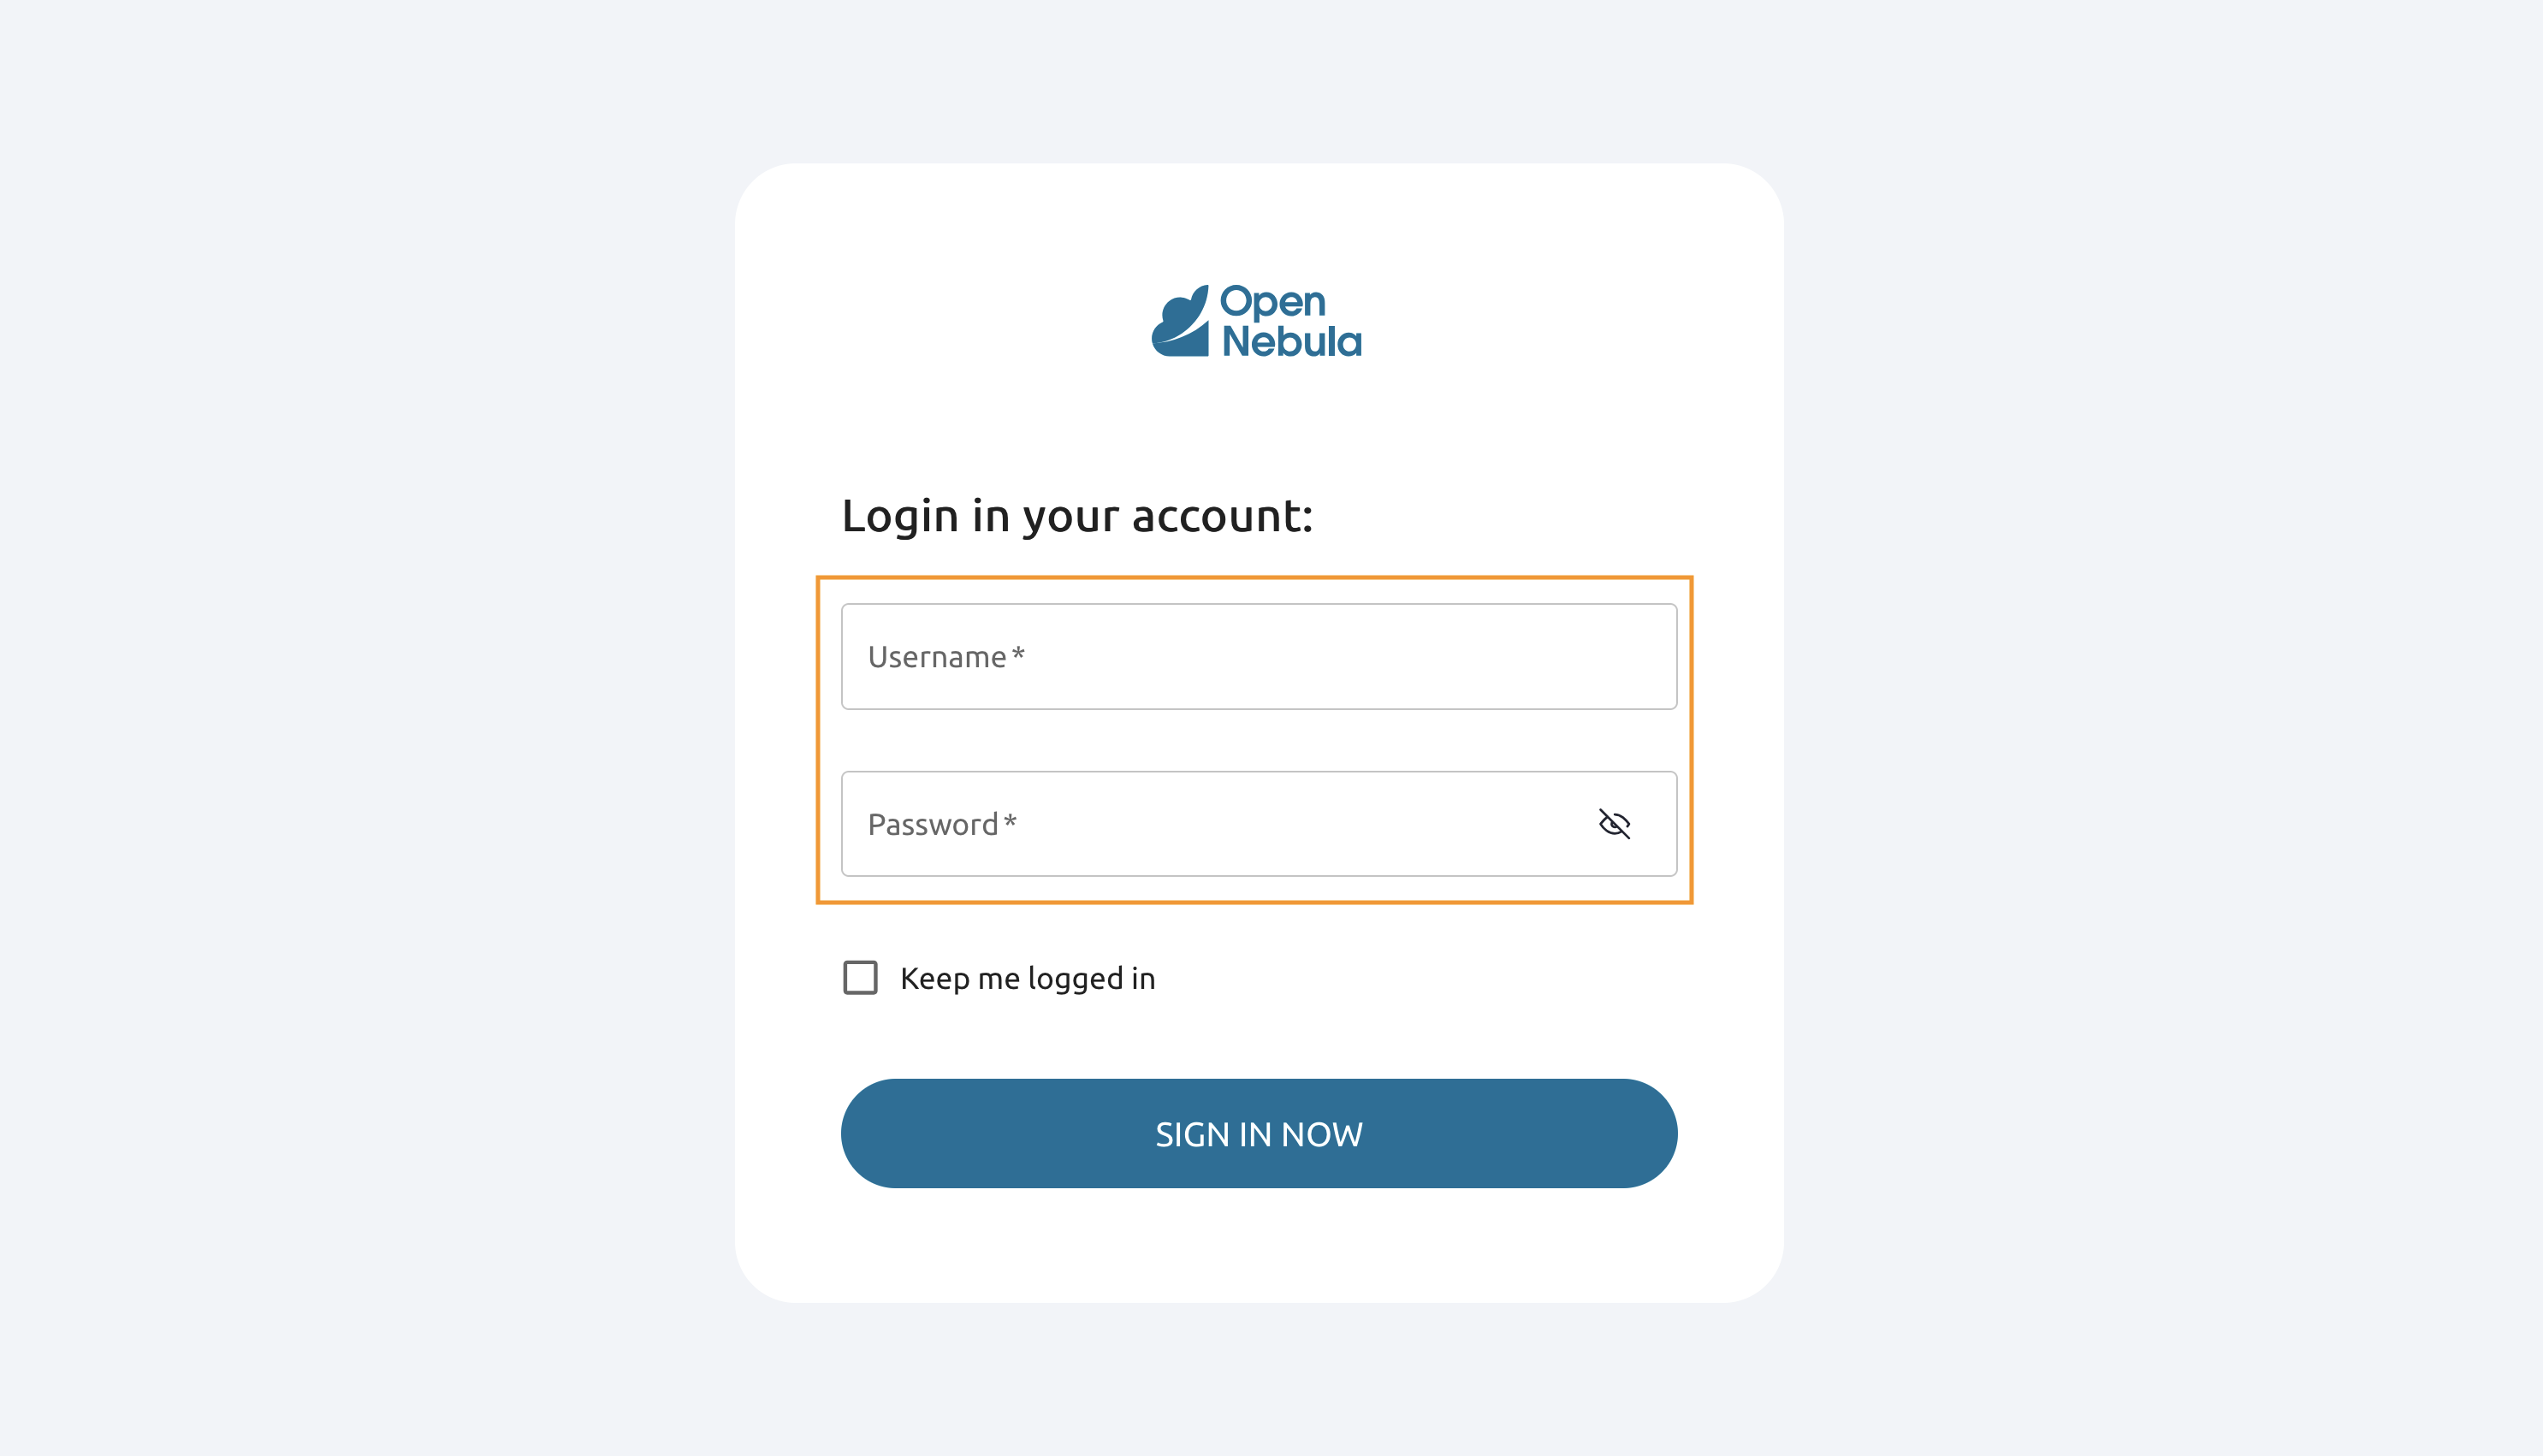
1.1.4
Return to Node 1’s console.
From the Node 1 (Frontend) server establish the ssh connection to the Node 2 (as oneadmin user).
oneadmin@lab-X-node1:~ssh lab-X-node2
Warning: Permanently added 'lab-2022-node2' (ED25519) to the list of known hosts.
Welcome to Ubuntu 24.04.2 LTS (GNU/Linux 6.8.0-1030-aws x86_64)
....
oneadmin@lab-X-node2:~dpkg -l | grep opennebula
ii  opennebula-common         7.2.0-1    all          Common OpenNebula package shared by various components (Community Edition)
ii  opennebula-common-onecfg  7.2.0-1    all          Helpers for OpenNebula onecfg (Community Edition)
ii  opennebula-node-kvm       7.2.0-1    all          Services for OpenNebula KVM node (Community Edition)
ii  opennebula-rubygems       7.2.0-1    amd64        Ruby dependencies for OpenNebula (Community Edition)
1.1.5
Let’s look at running services on the Node 2.
systemctl | grep opennebula
You shouldn’t have any opennebula services on Nodes 2 & 3, however you must have libvirt running on both nodes.
systemctl | grep libvirt
libvirt-guests.service    		loaded    active     exited    libvirt guests suspend/resume service
libvirtd.service          		loaded    active     running   libvirt legacy monolithic daemon
virtlockd.service         		loaded    active     running   libvirt locking daemon
virtlogd.service          		loaded    active     running   libvirt logging daemon
libvirtd-admin.socket     		loaded    active     running   libvirt legacy monolithic daemon admin socket
libvirtd-ro.socket        		loaded    active     running   libvirt legacy monolithic daemon read-only socket
libvirtd.socket           		loaded    active     running   libvirt legacy monolithic daemon socket
virtlockd-admin.socket    		loaded    active     running   libvirt locking daemon admin socket
virtlockd.socket          		loaded    active     running   libvirt locking daemon socket
virtlogd-admin.socket     		loaded    active     running   libvirt logging daemon admin socket
virtlogd.socket           		loaded    active     running   libvirt logging daemon socket
virt-guest-shutdown.target		loaded    active     active    libvirt guests shutdown target
exit to the Node 1 once done.
exit
1.1.6
On Node 1 make sure you are logged in as oneadmin and execute the cat command.
cat ~/.ssh/id_rsa
-----BEGIN OPENSSH PRIVATE KEY-----
b3BlbnNzaC1rZXktdjEAAAAABG5vbmUAAAAEbm9uZQAAAAAAAAABAAABlwAAAAdzc2gtcn
NhAAAAAwEAAQAAAYEA1o6N1Y/9Q5KZyIRJySPeG8OcVe7LzA2iy8IAioke3bBs1NpNVDmk

...
uqcjK6Uh/CAbOycfXu7RHDuoeQVtJ81Gdc52Q5y2RhWzeLt1sJoM0Et9qSLxbeLK0hoNs/
RjkqlibWhxOiqwBxBEAyR3PrdbtRtmIVzMZlfhEJ3rBwQoaGLjiyvHILrsPSVT2C6SaPnZ
YzSoldmKW6cmHjAAAAF29uZWFkbWluQGxhYi0yMDIyLW5vZGUxAQID
-----END OPENSSH PRIVATE KEY-----
Copy the entire key - you are going to need it in the future steps
1.1.7
In Sunstone - go to Settings.
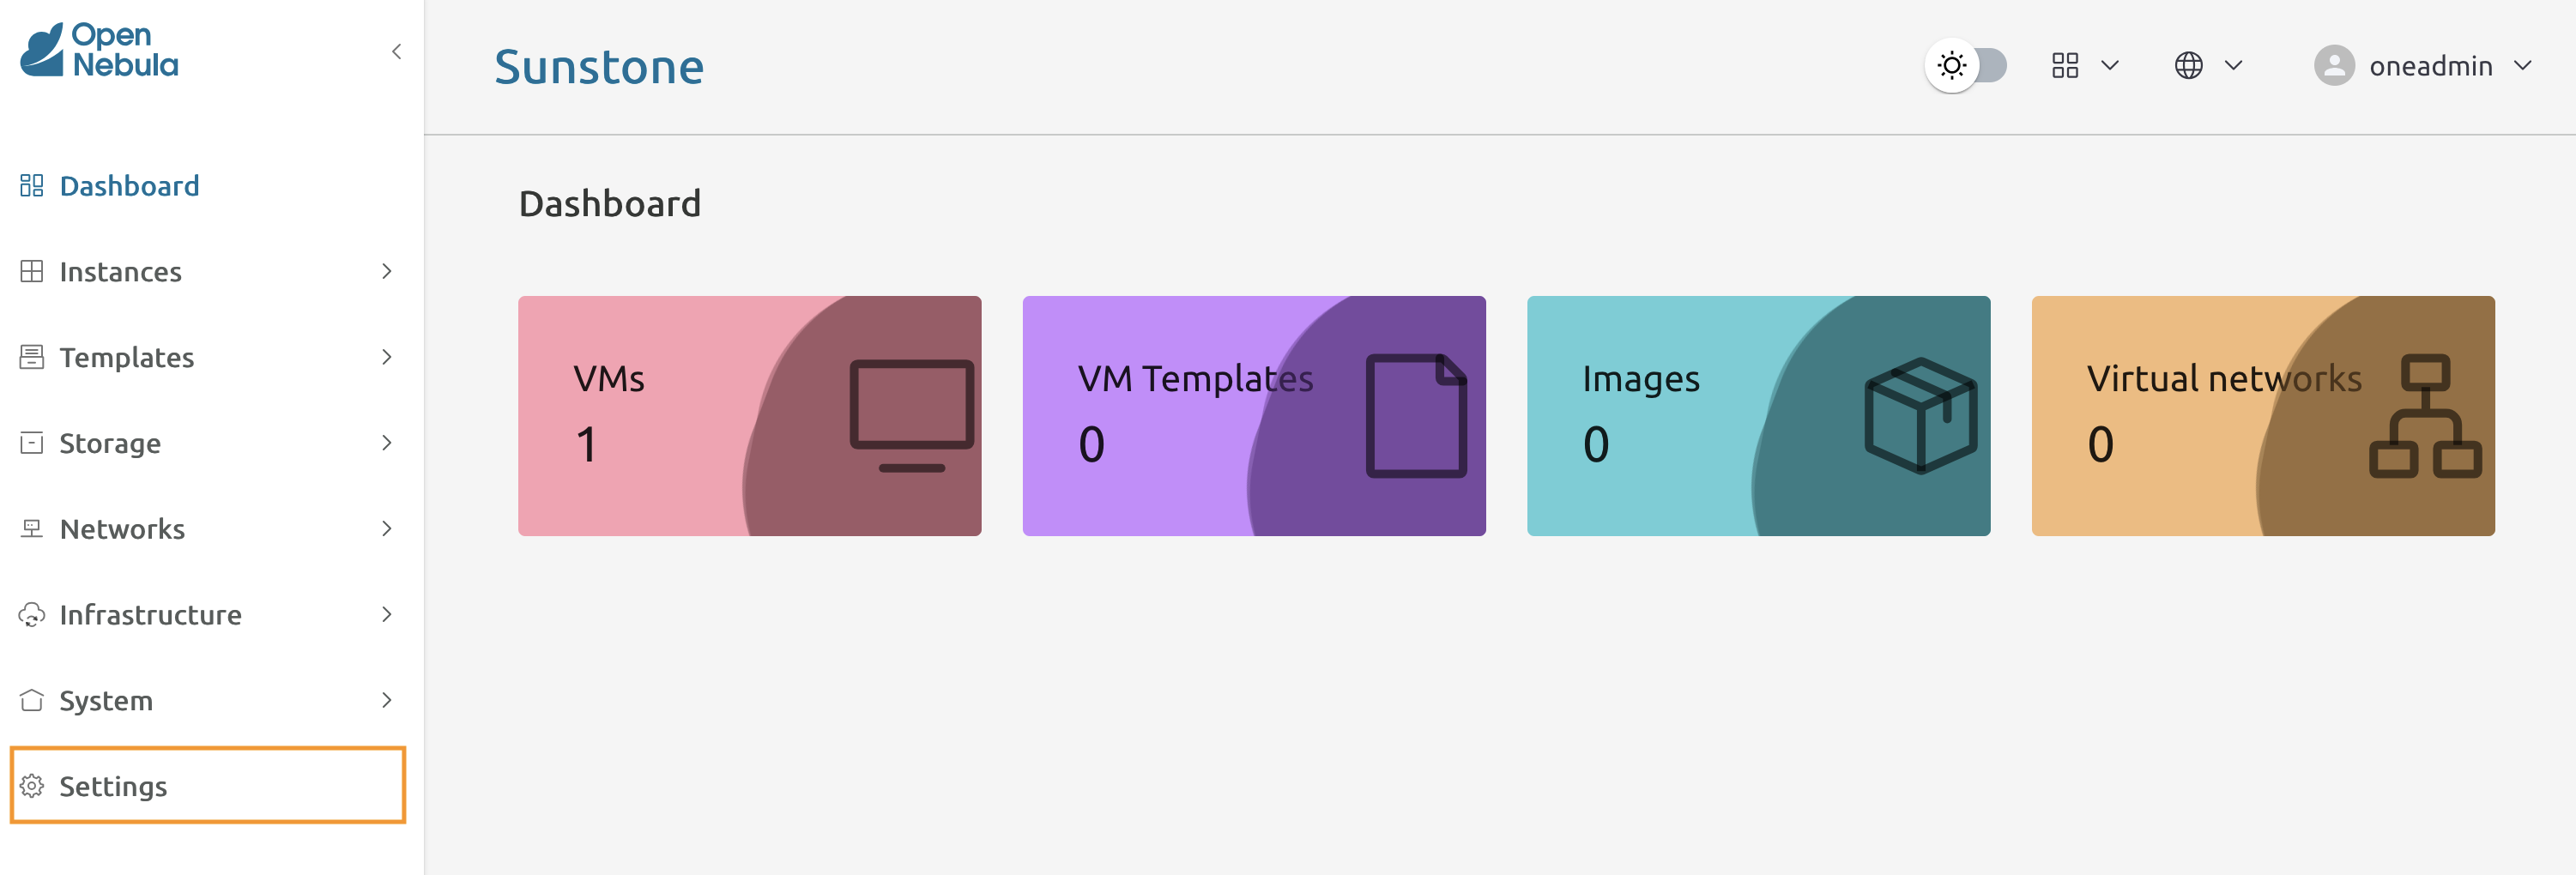
1.1.8
In the Settings go to Security, locate the SSH private key field and press the edit button.
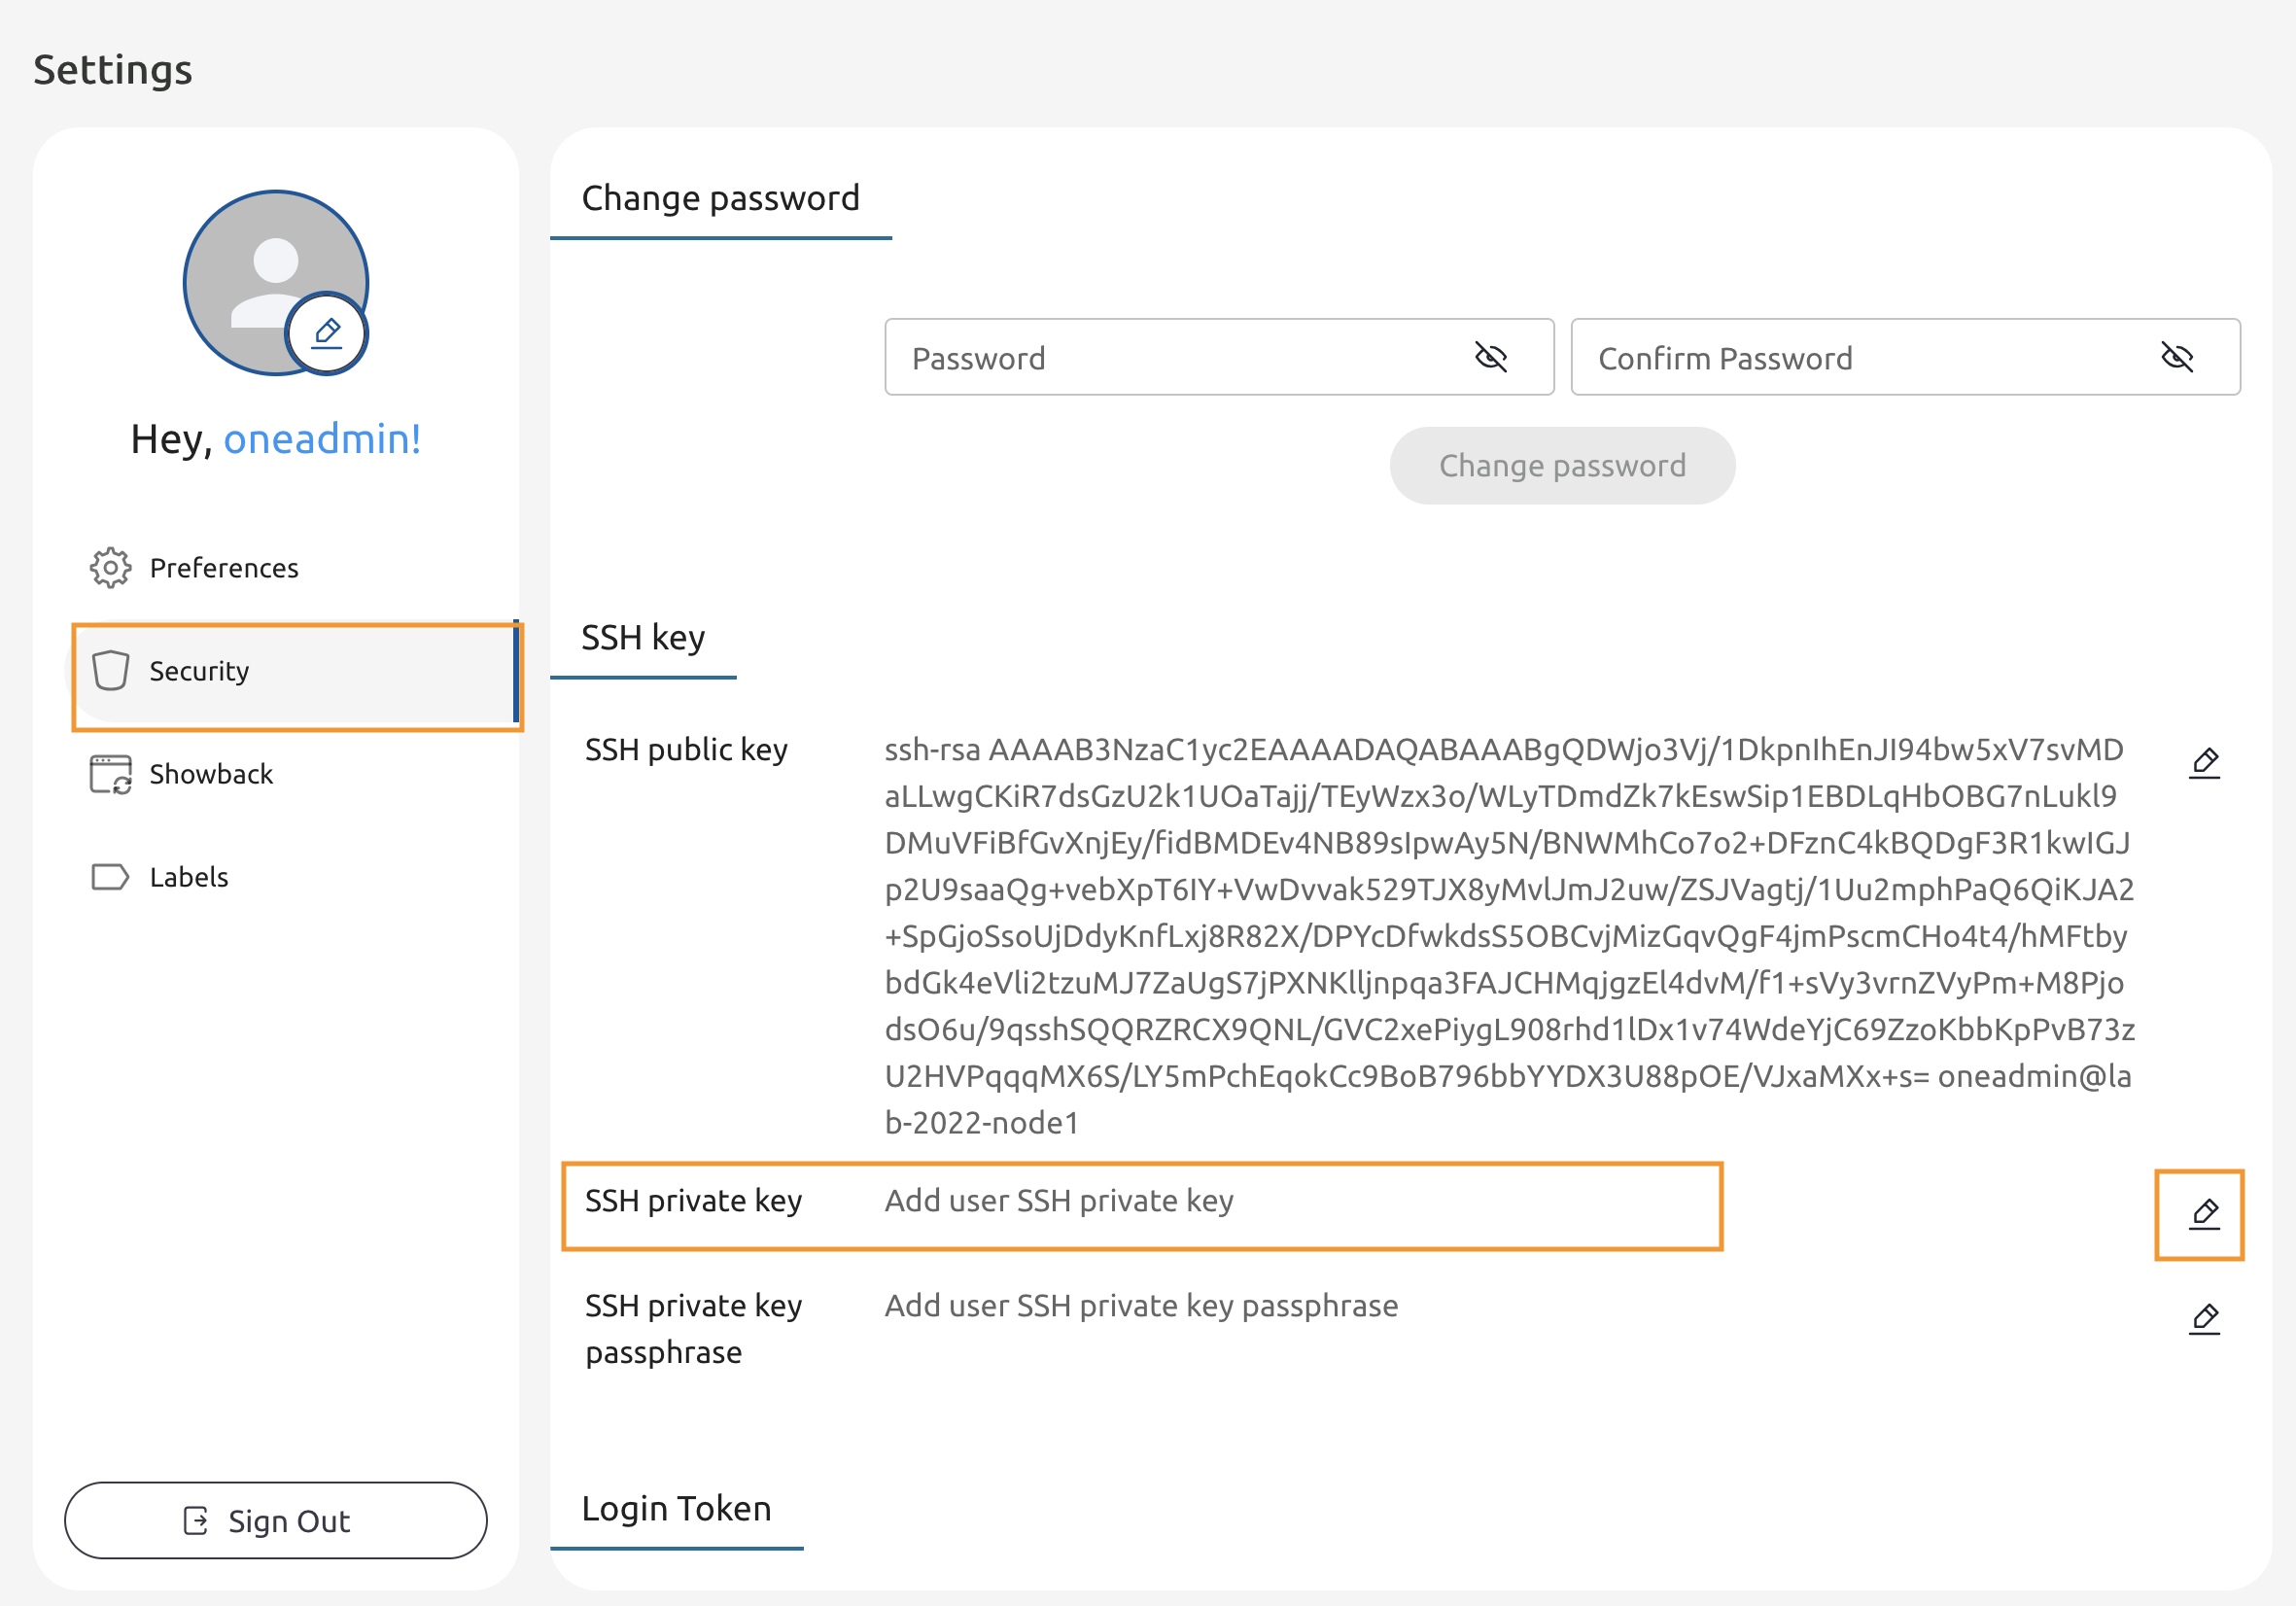
1.1.9
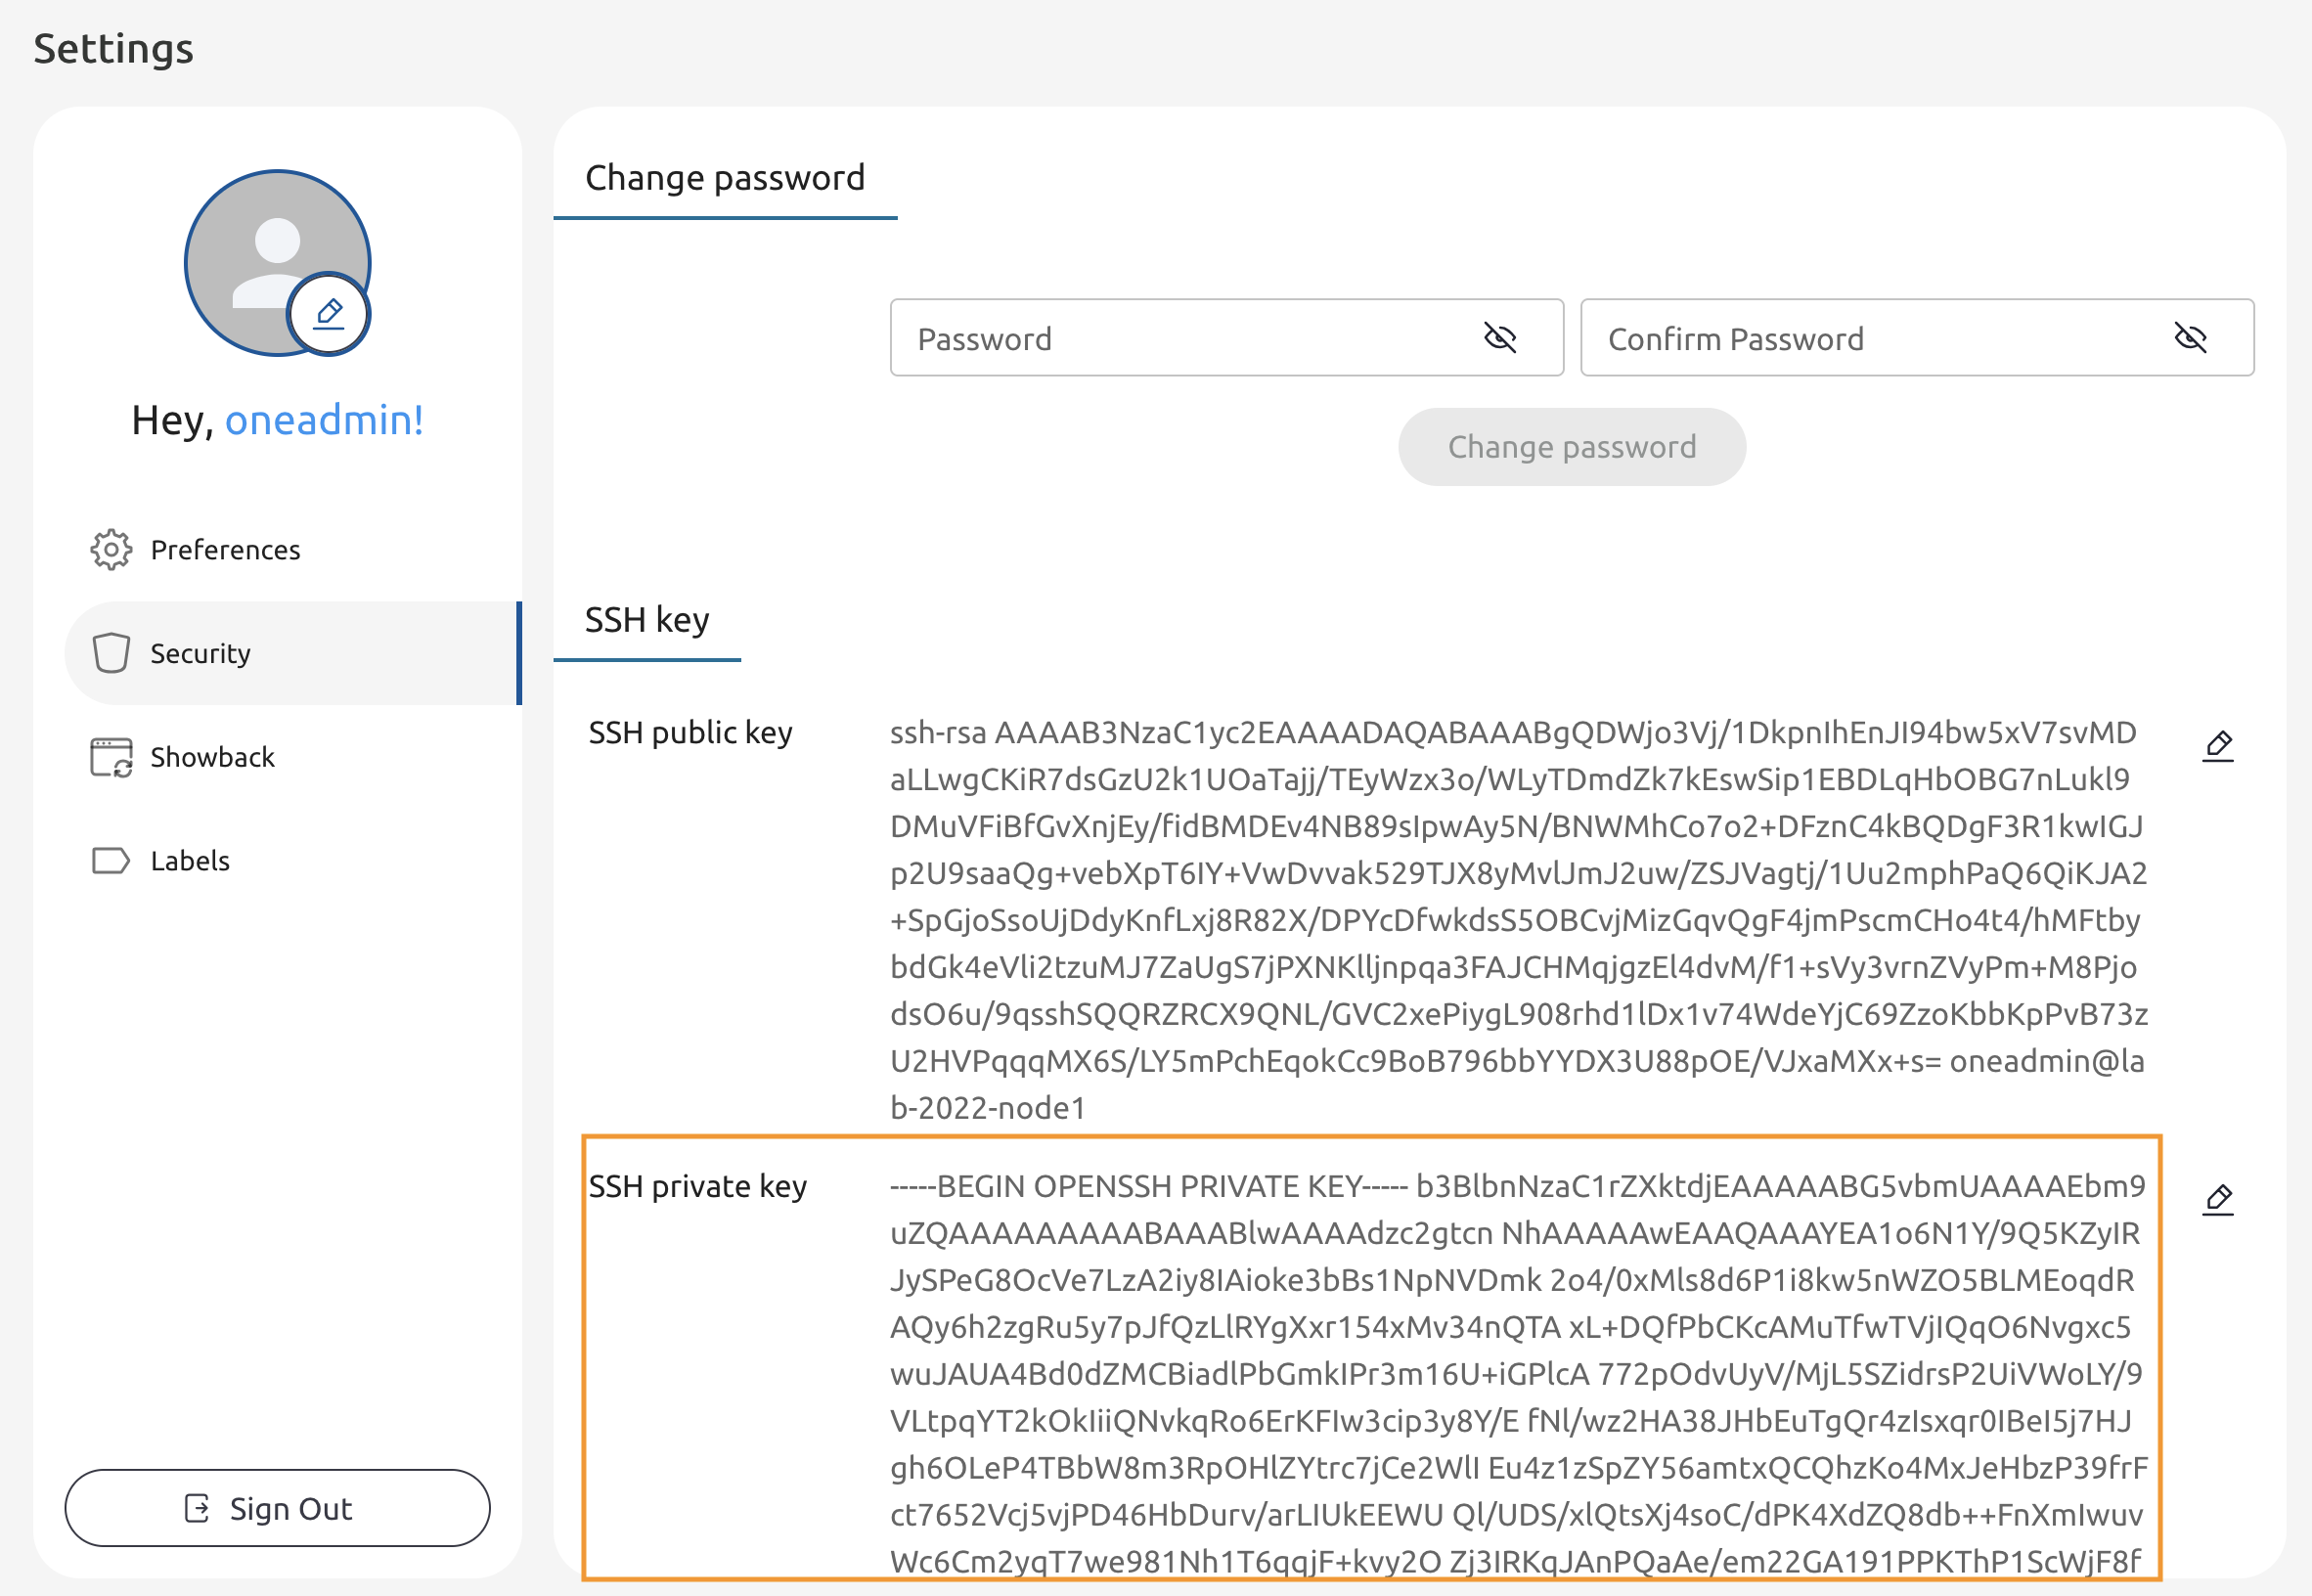
Paste the certificate contents and click anywhere outside of the field.
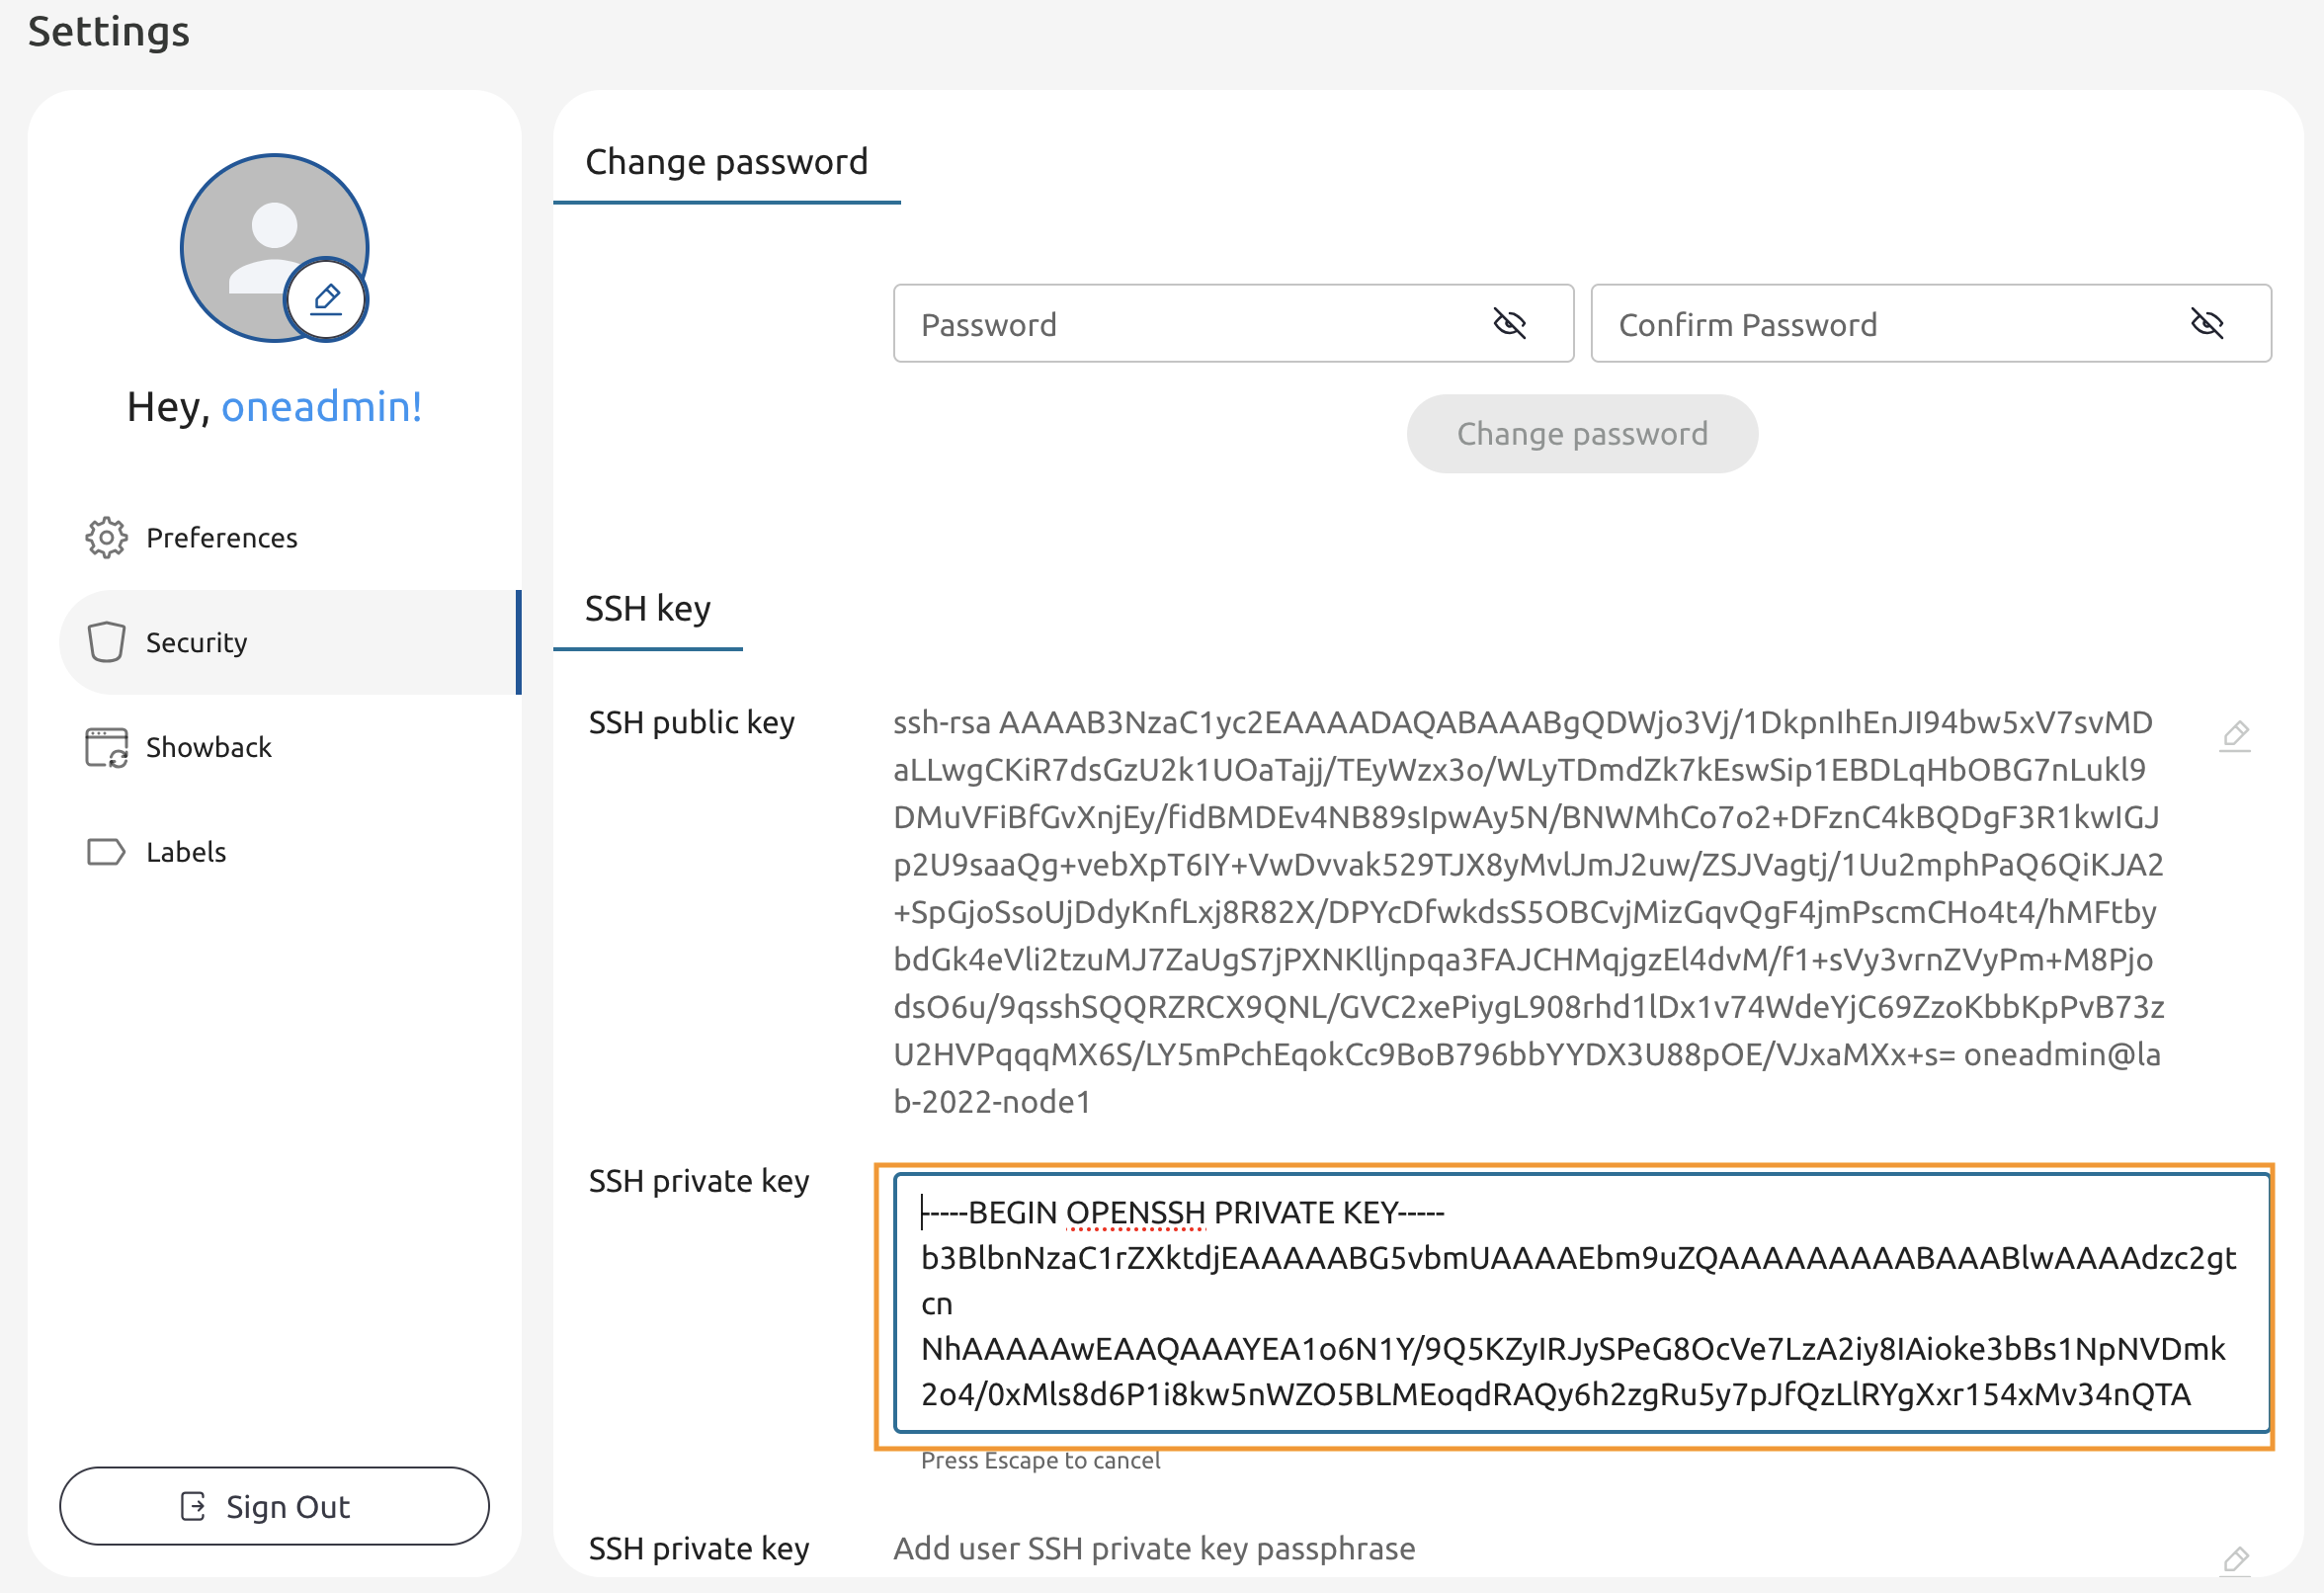
1.1.10
The private key should be saved now.