Module 8 - Lab 3 : Deploy and Manage the VMs
Table of Contents
Expand to access the In-page navigation
Objective(-s):
- Deploy the Database VM.
- Deploy the Application VM.
- Verify the deployed Application.
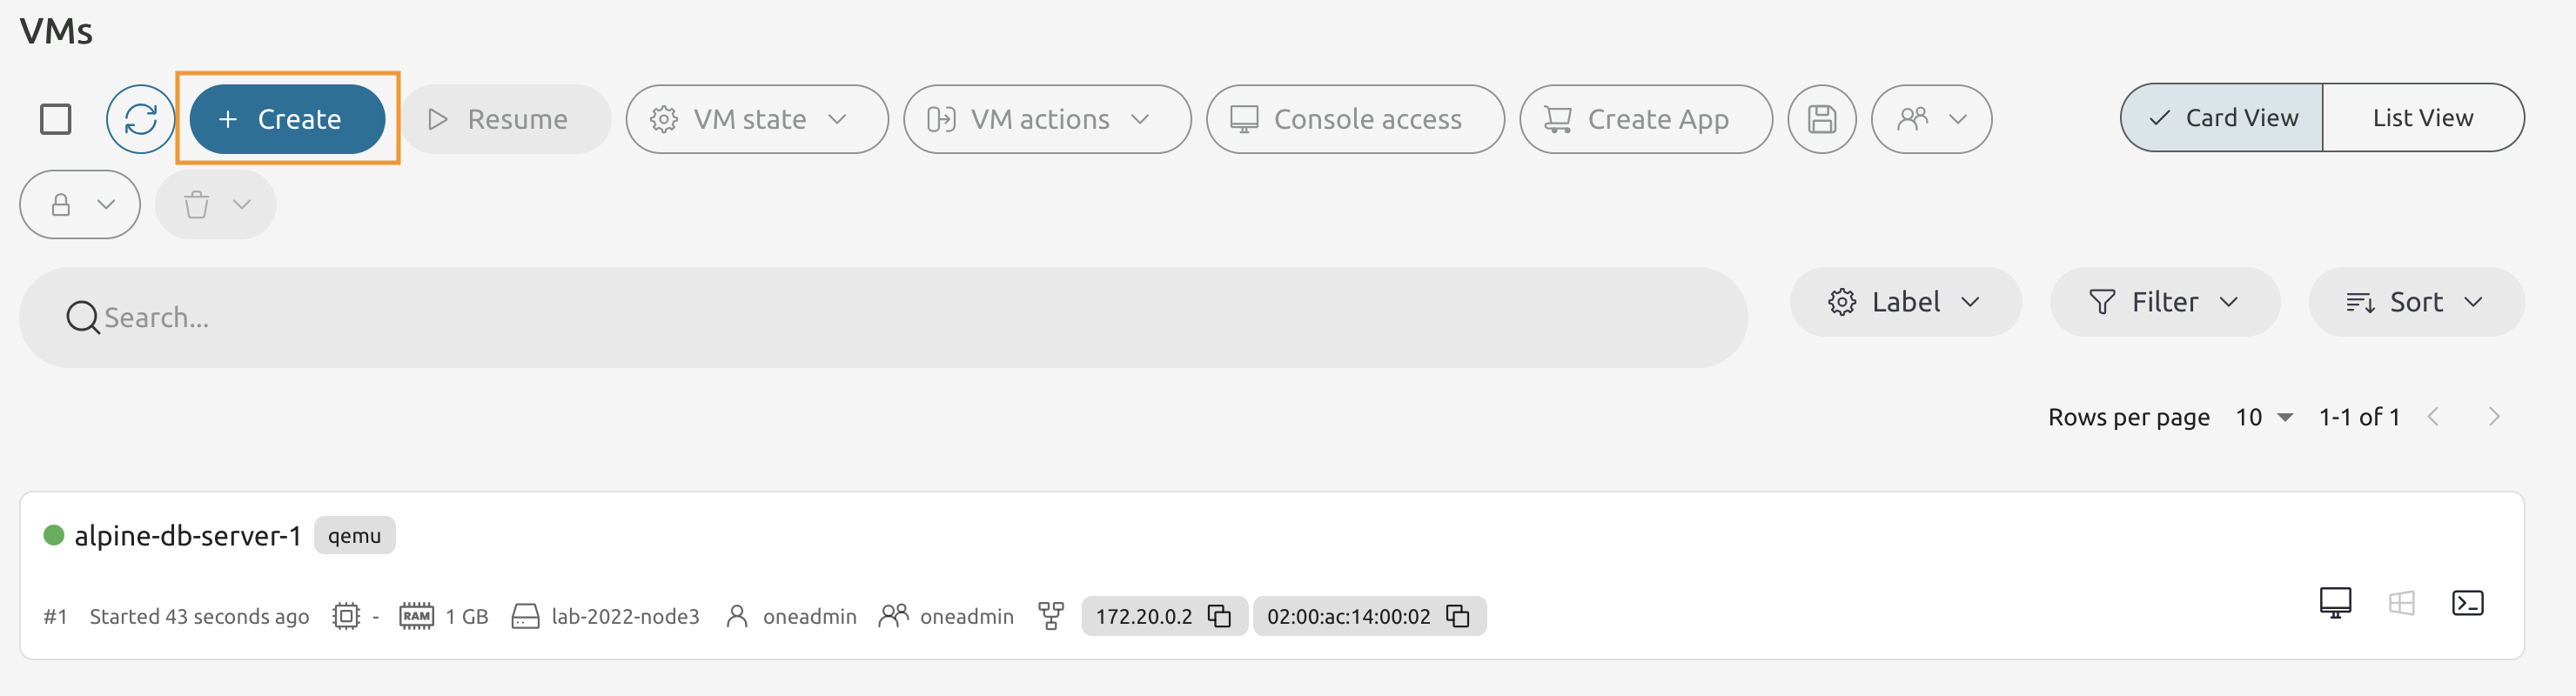
Deploy the Database VM.
8.3.1
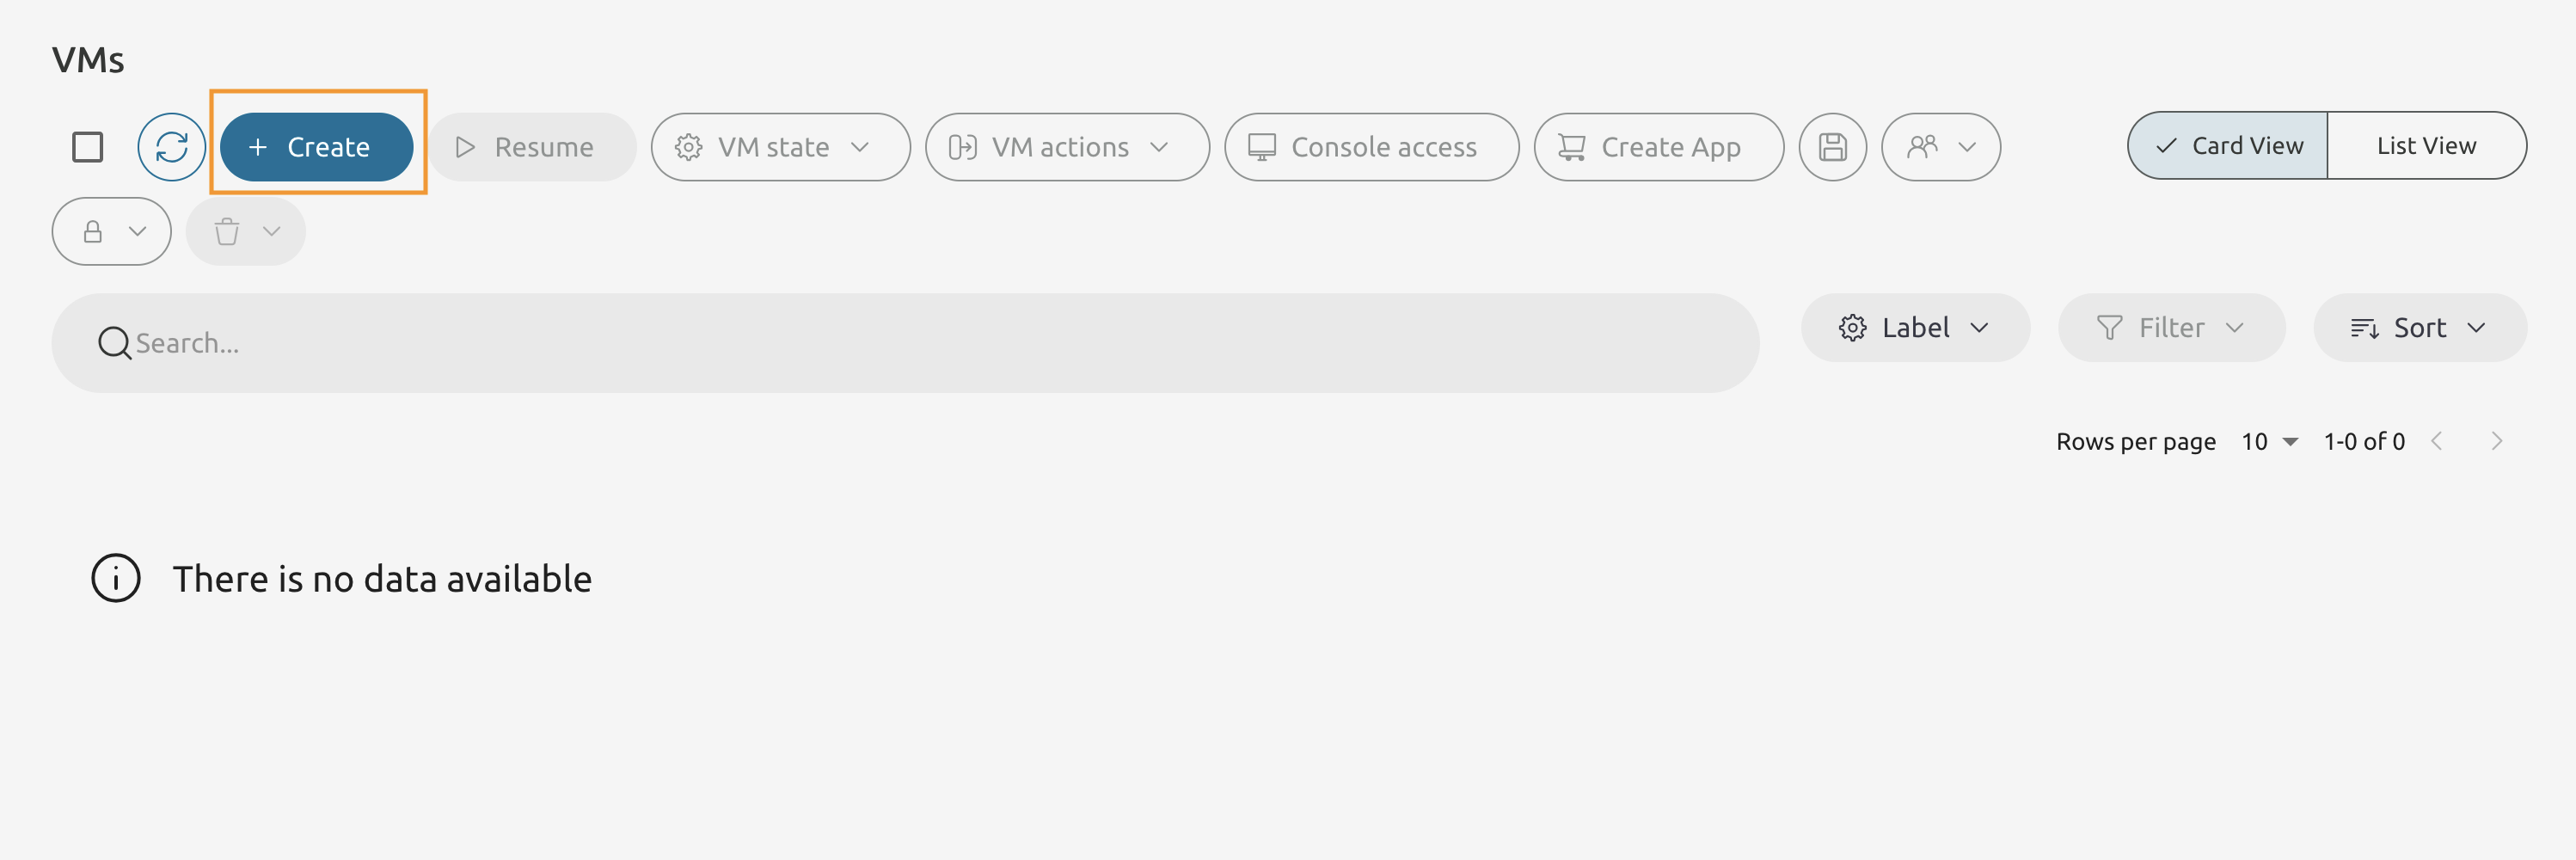
One the VMs screen press the Create button.
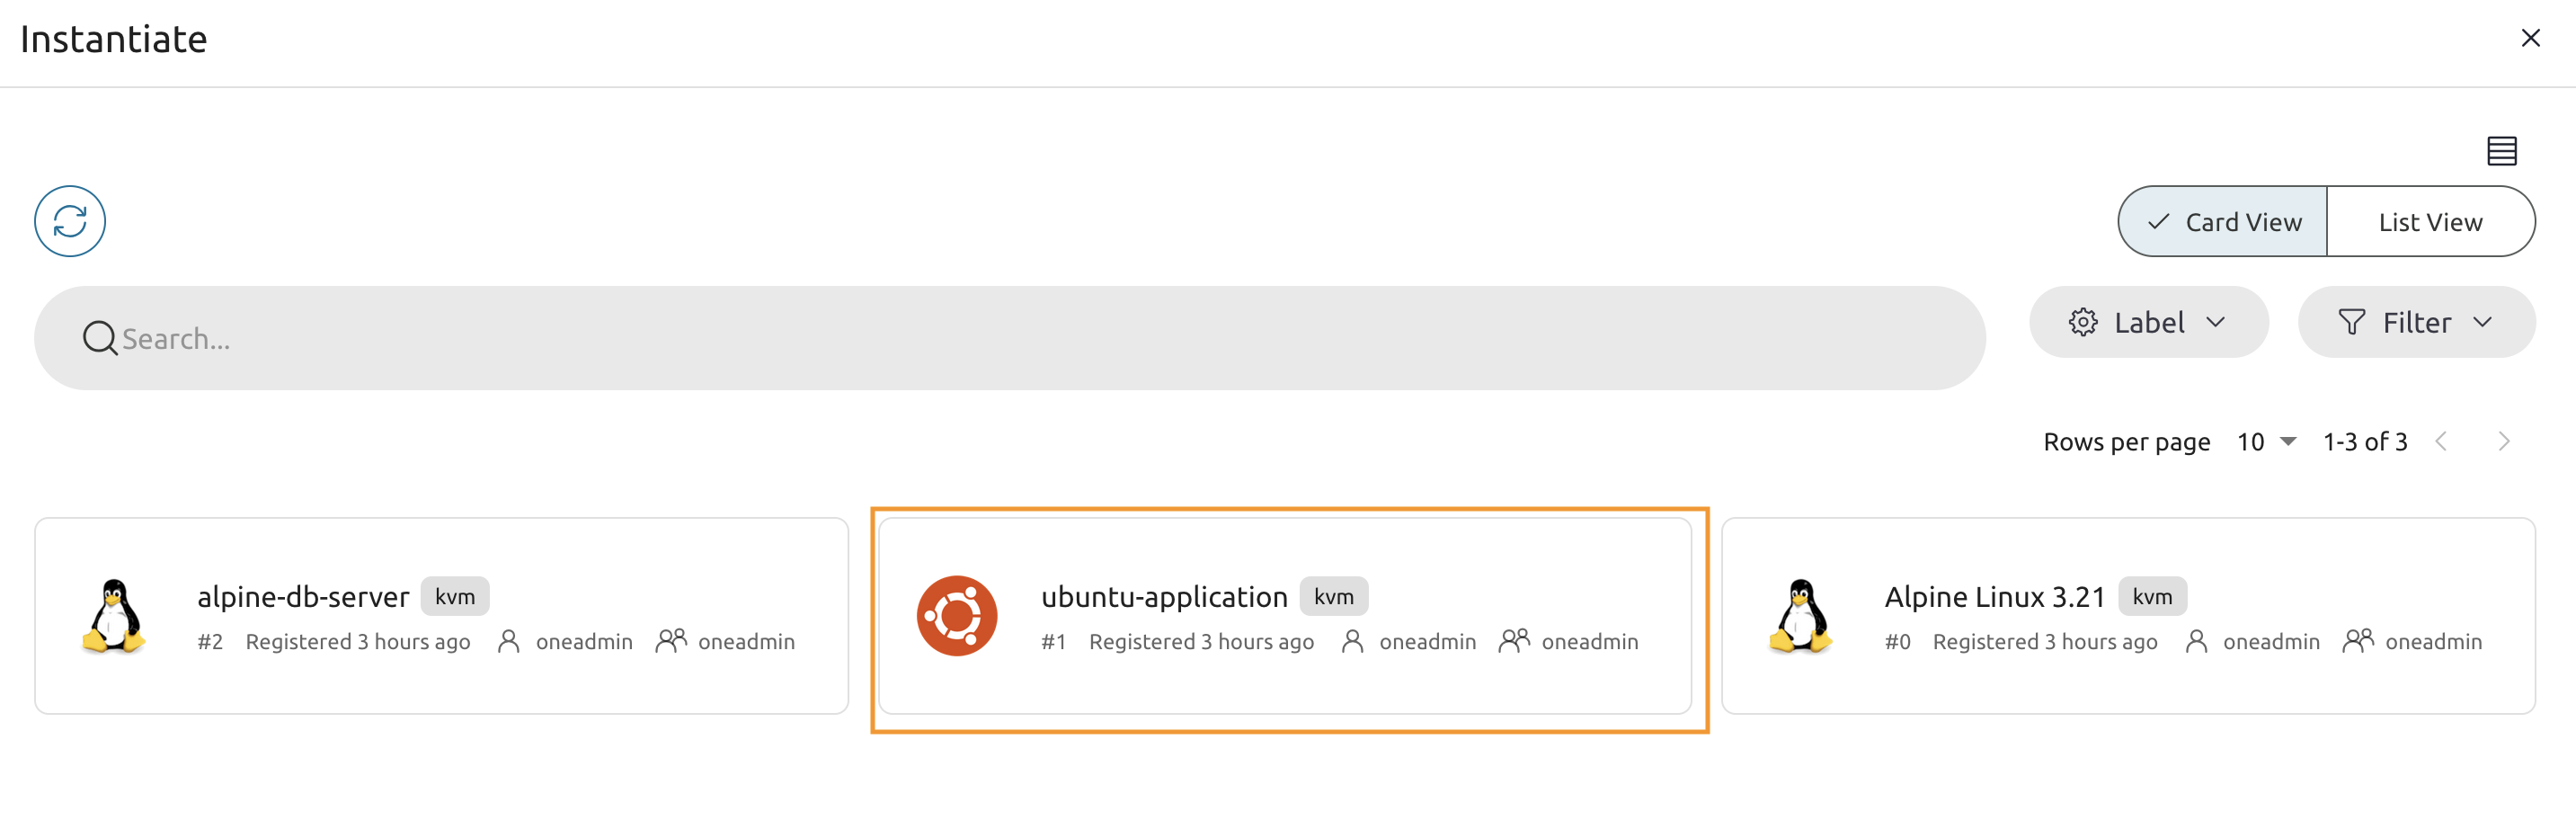
8.3.2
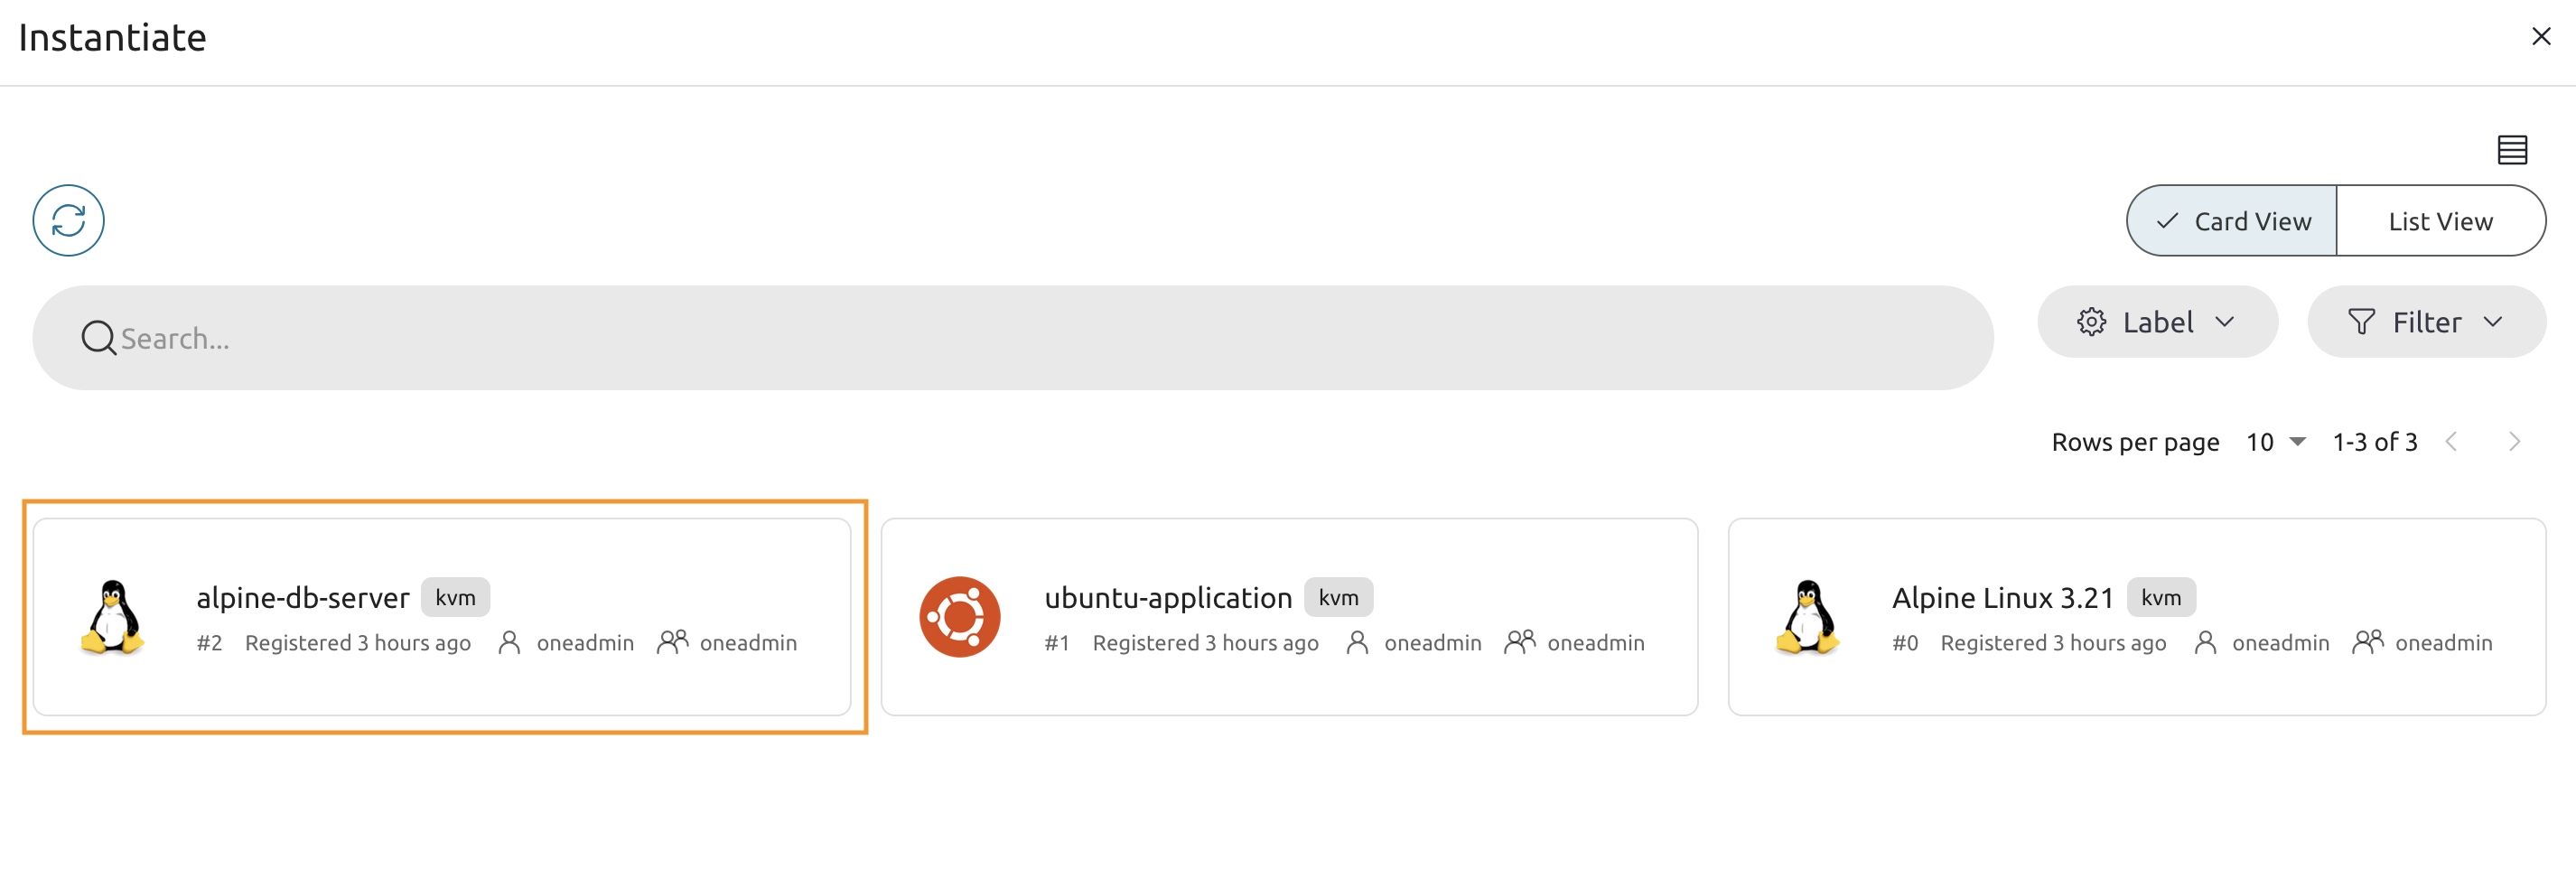
From the list of templates select the alpine-db-server VM Template.
8.3.3
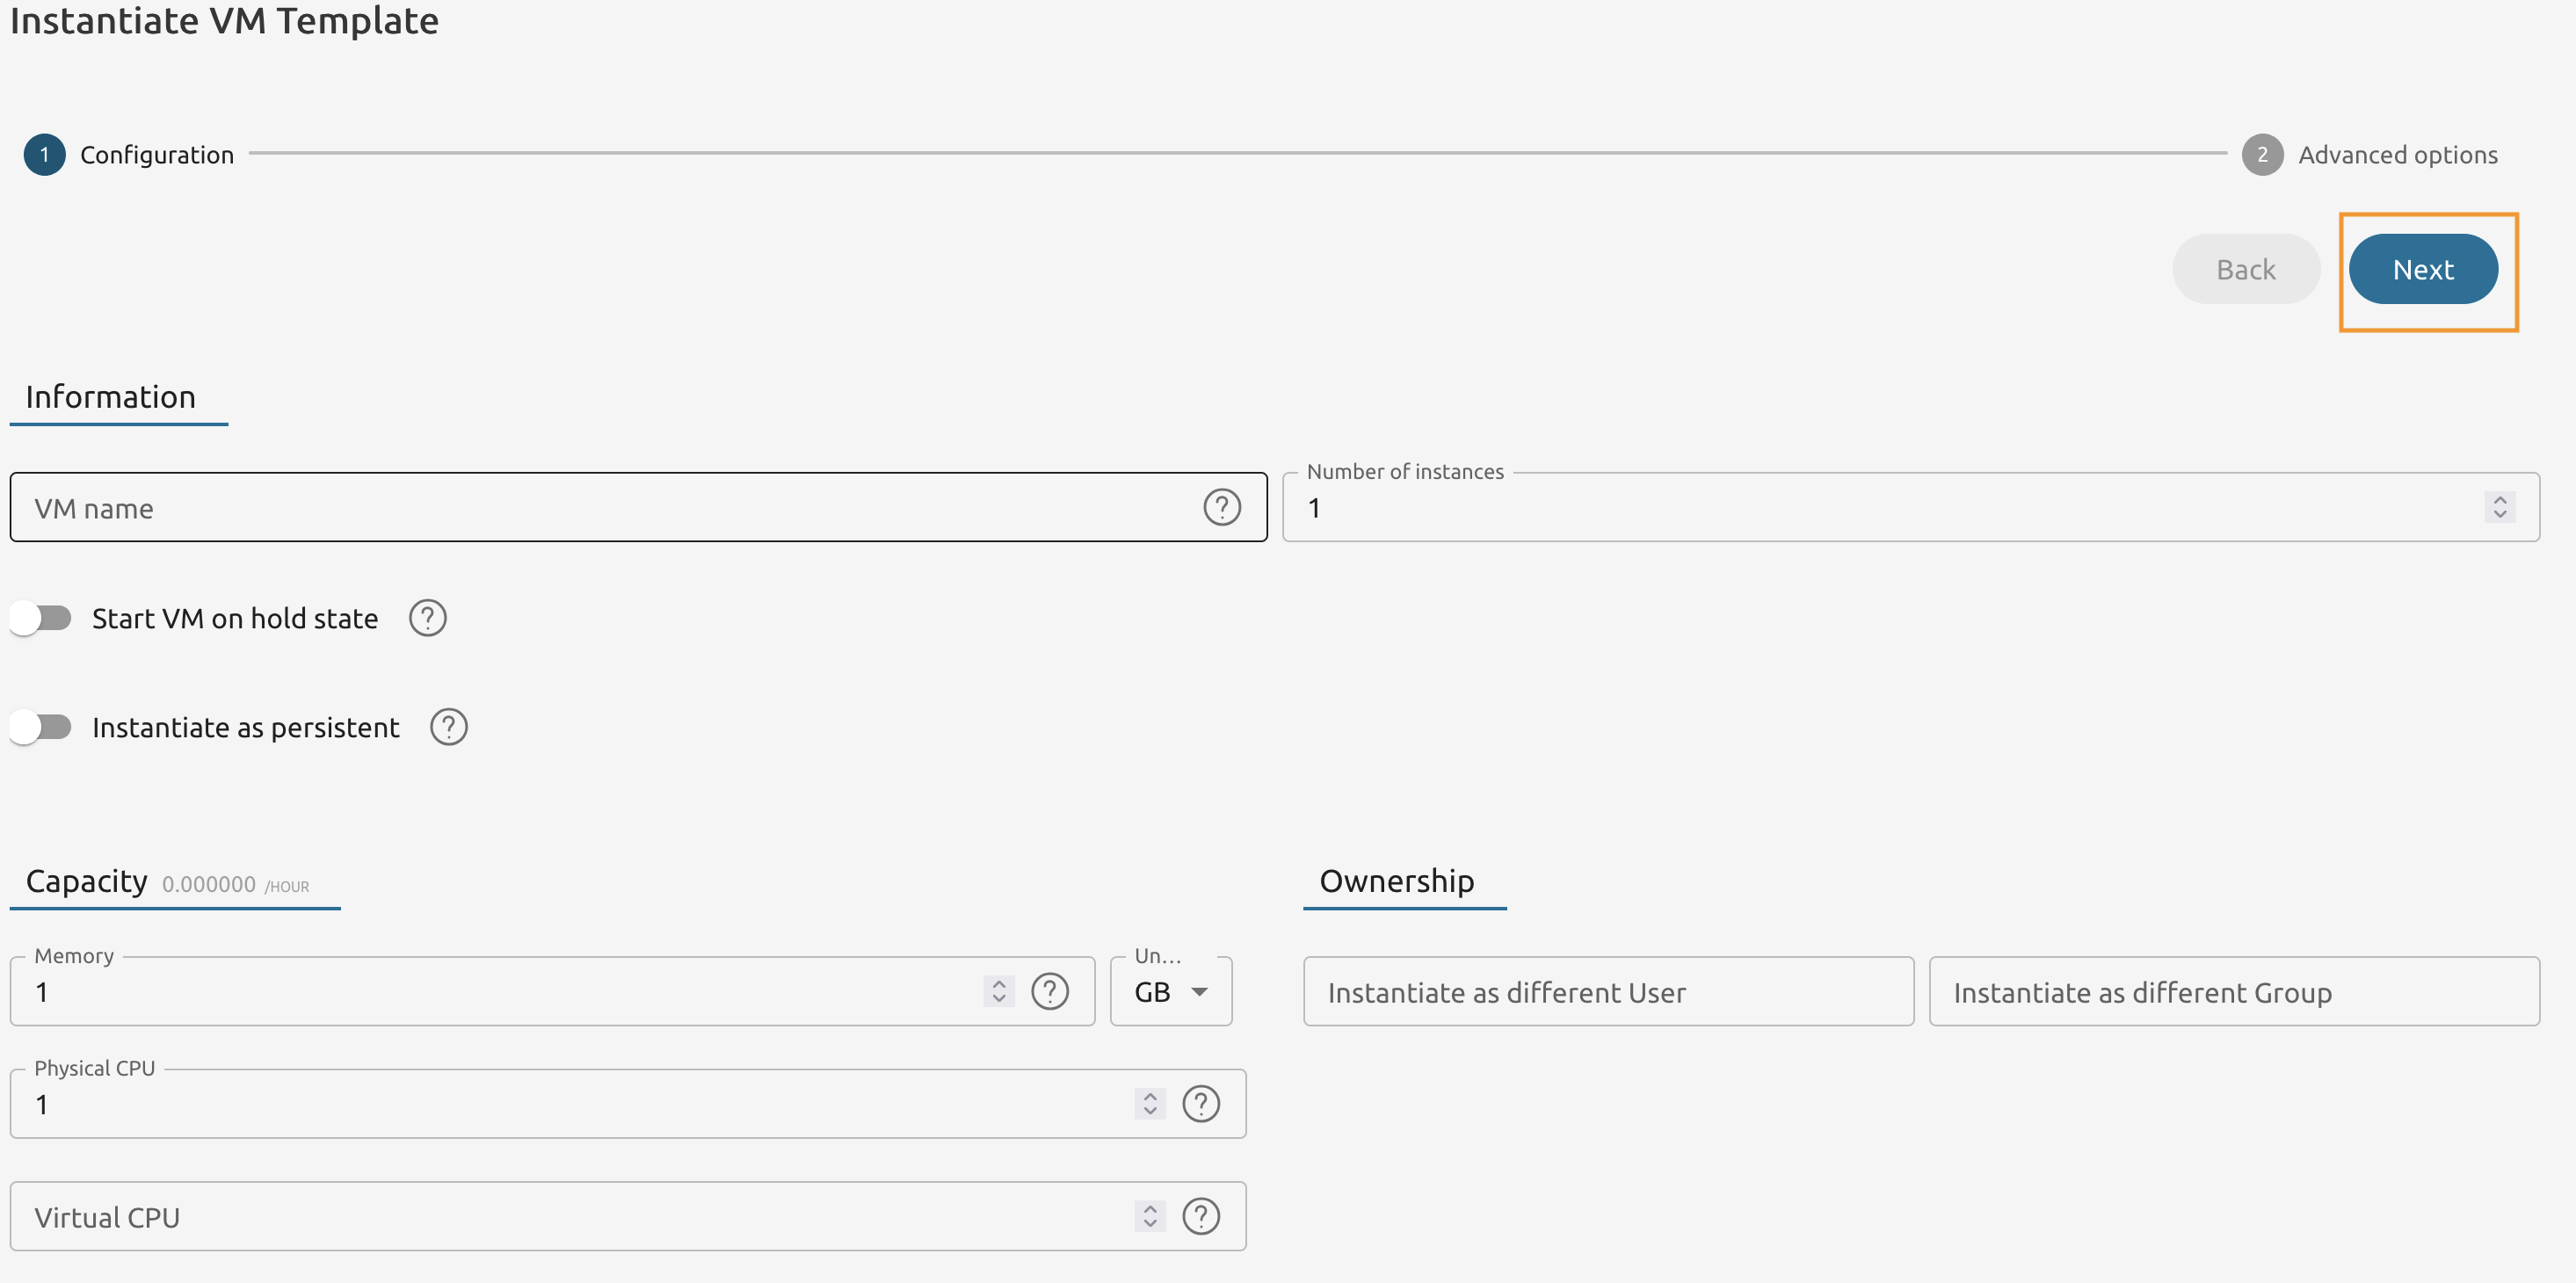
Keep everything as is and proceed to the next configurations screen.
8.3.4
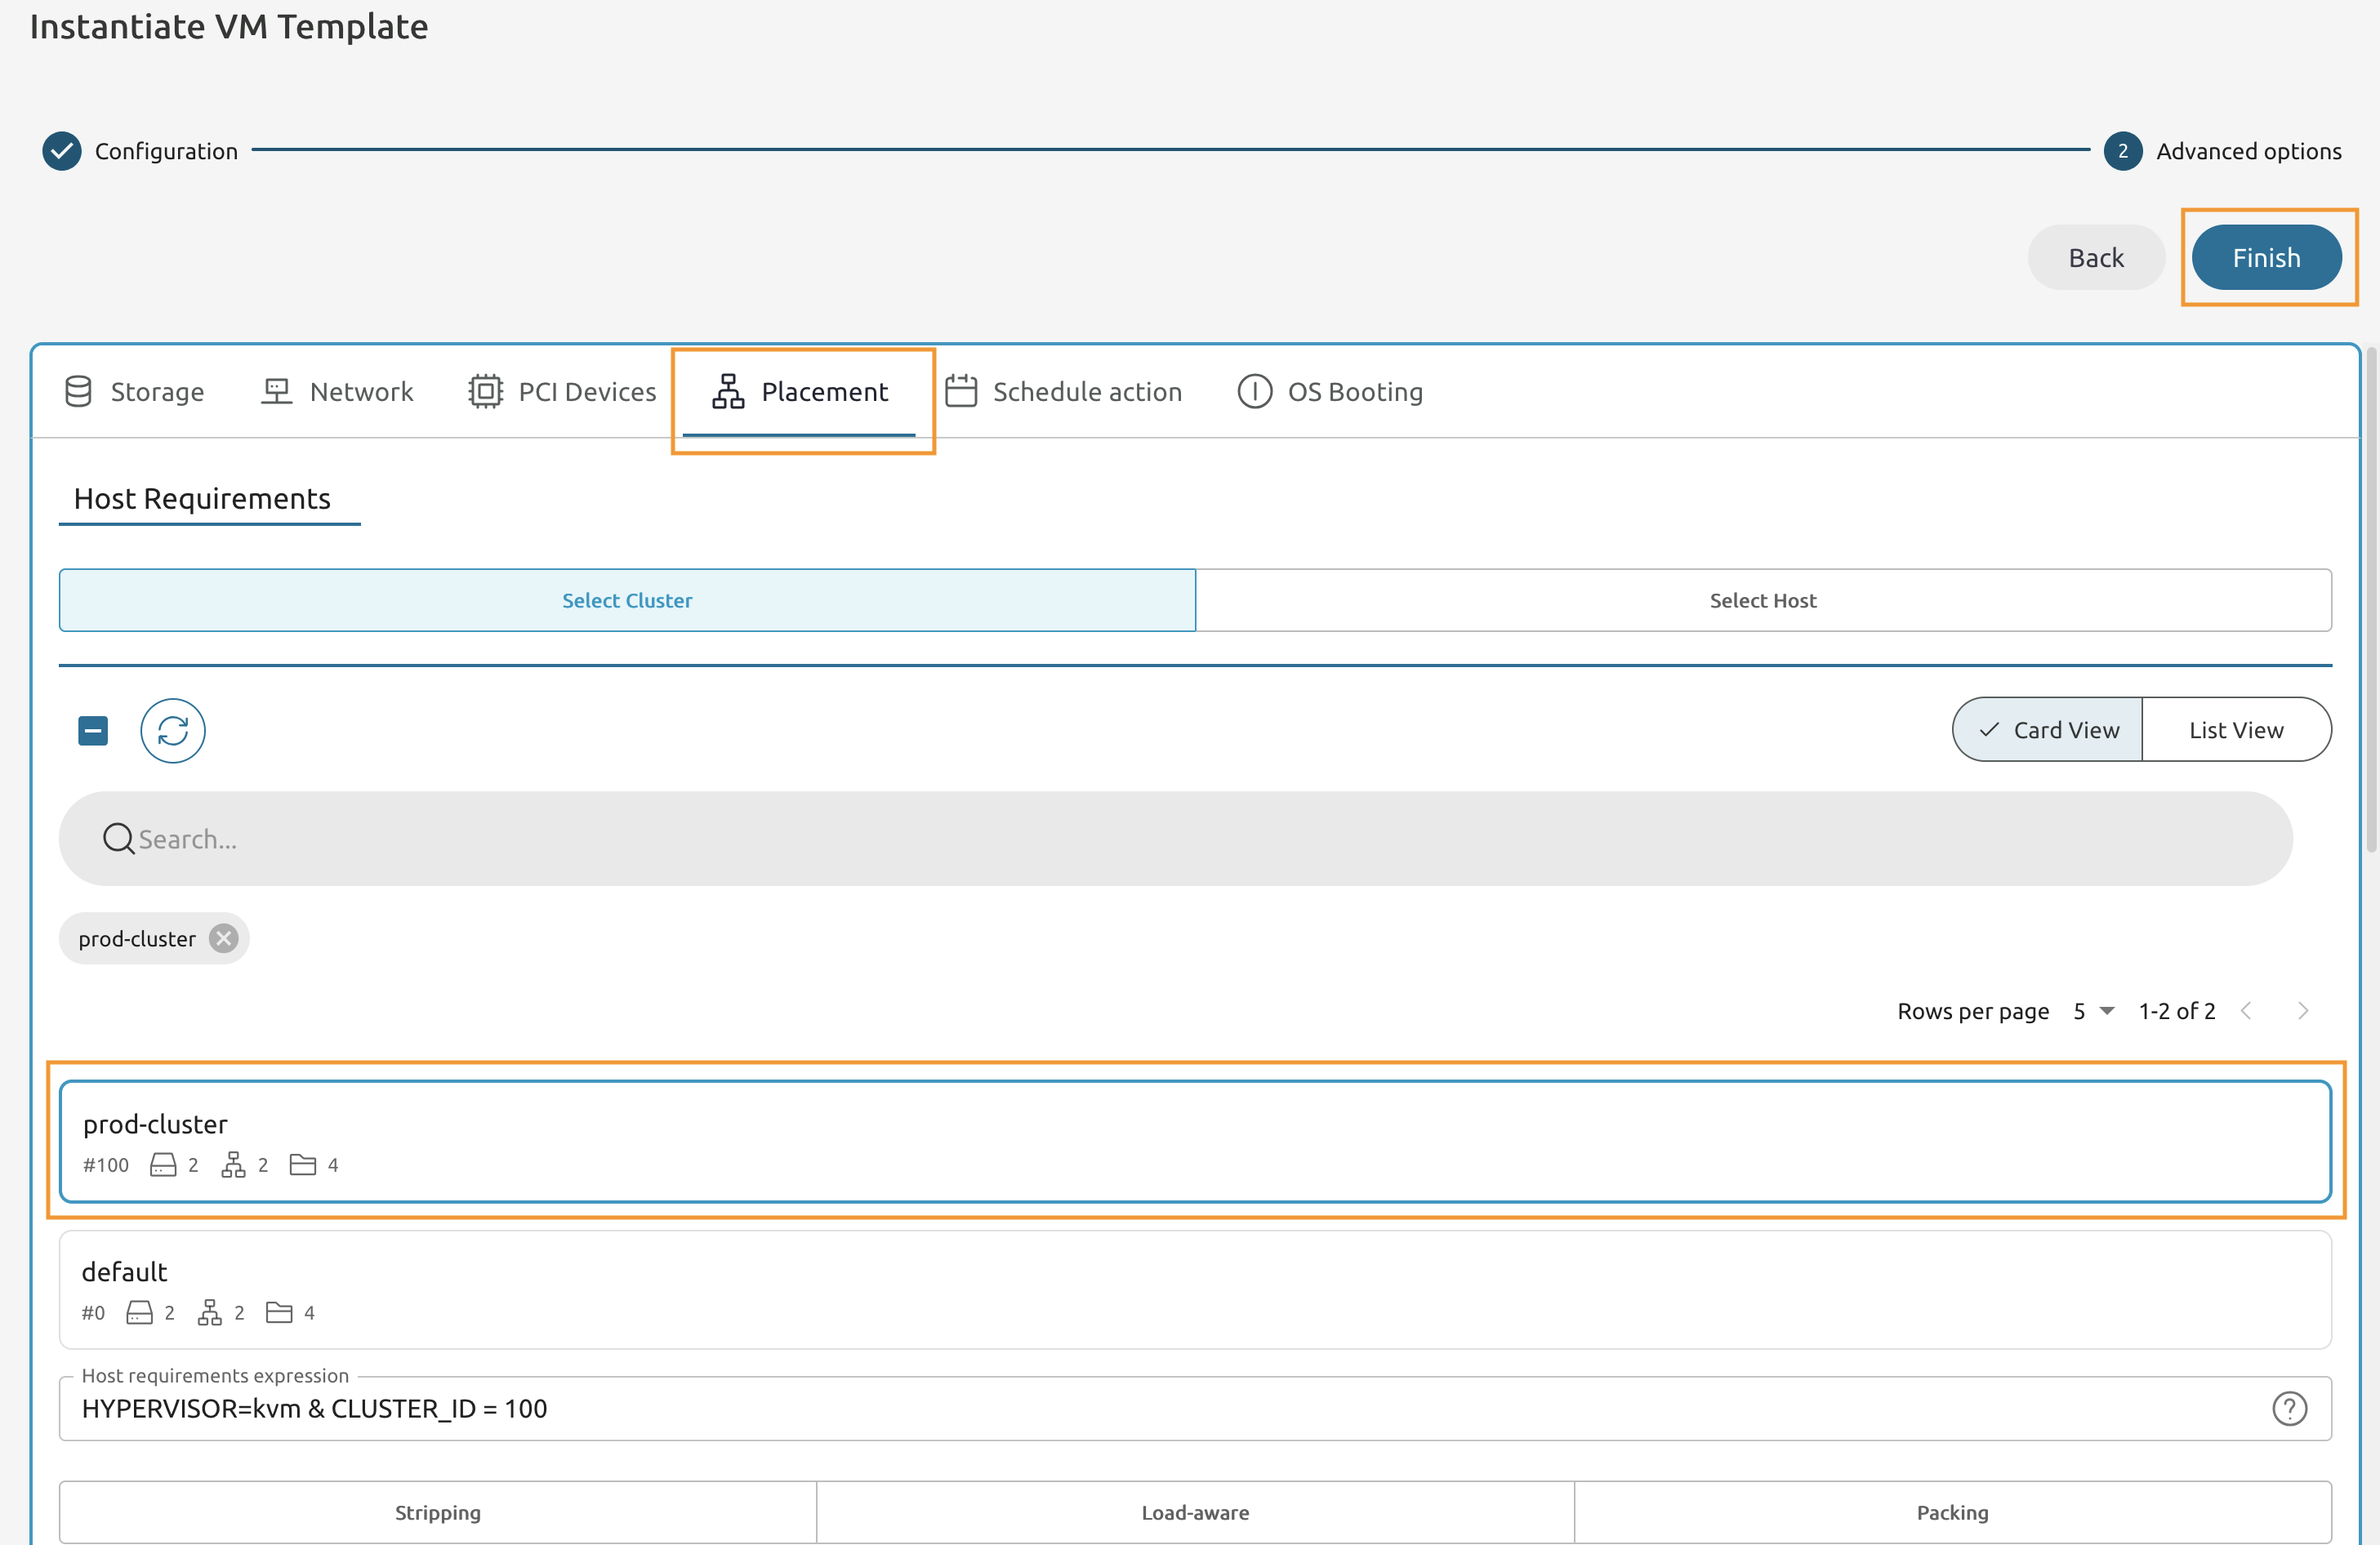
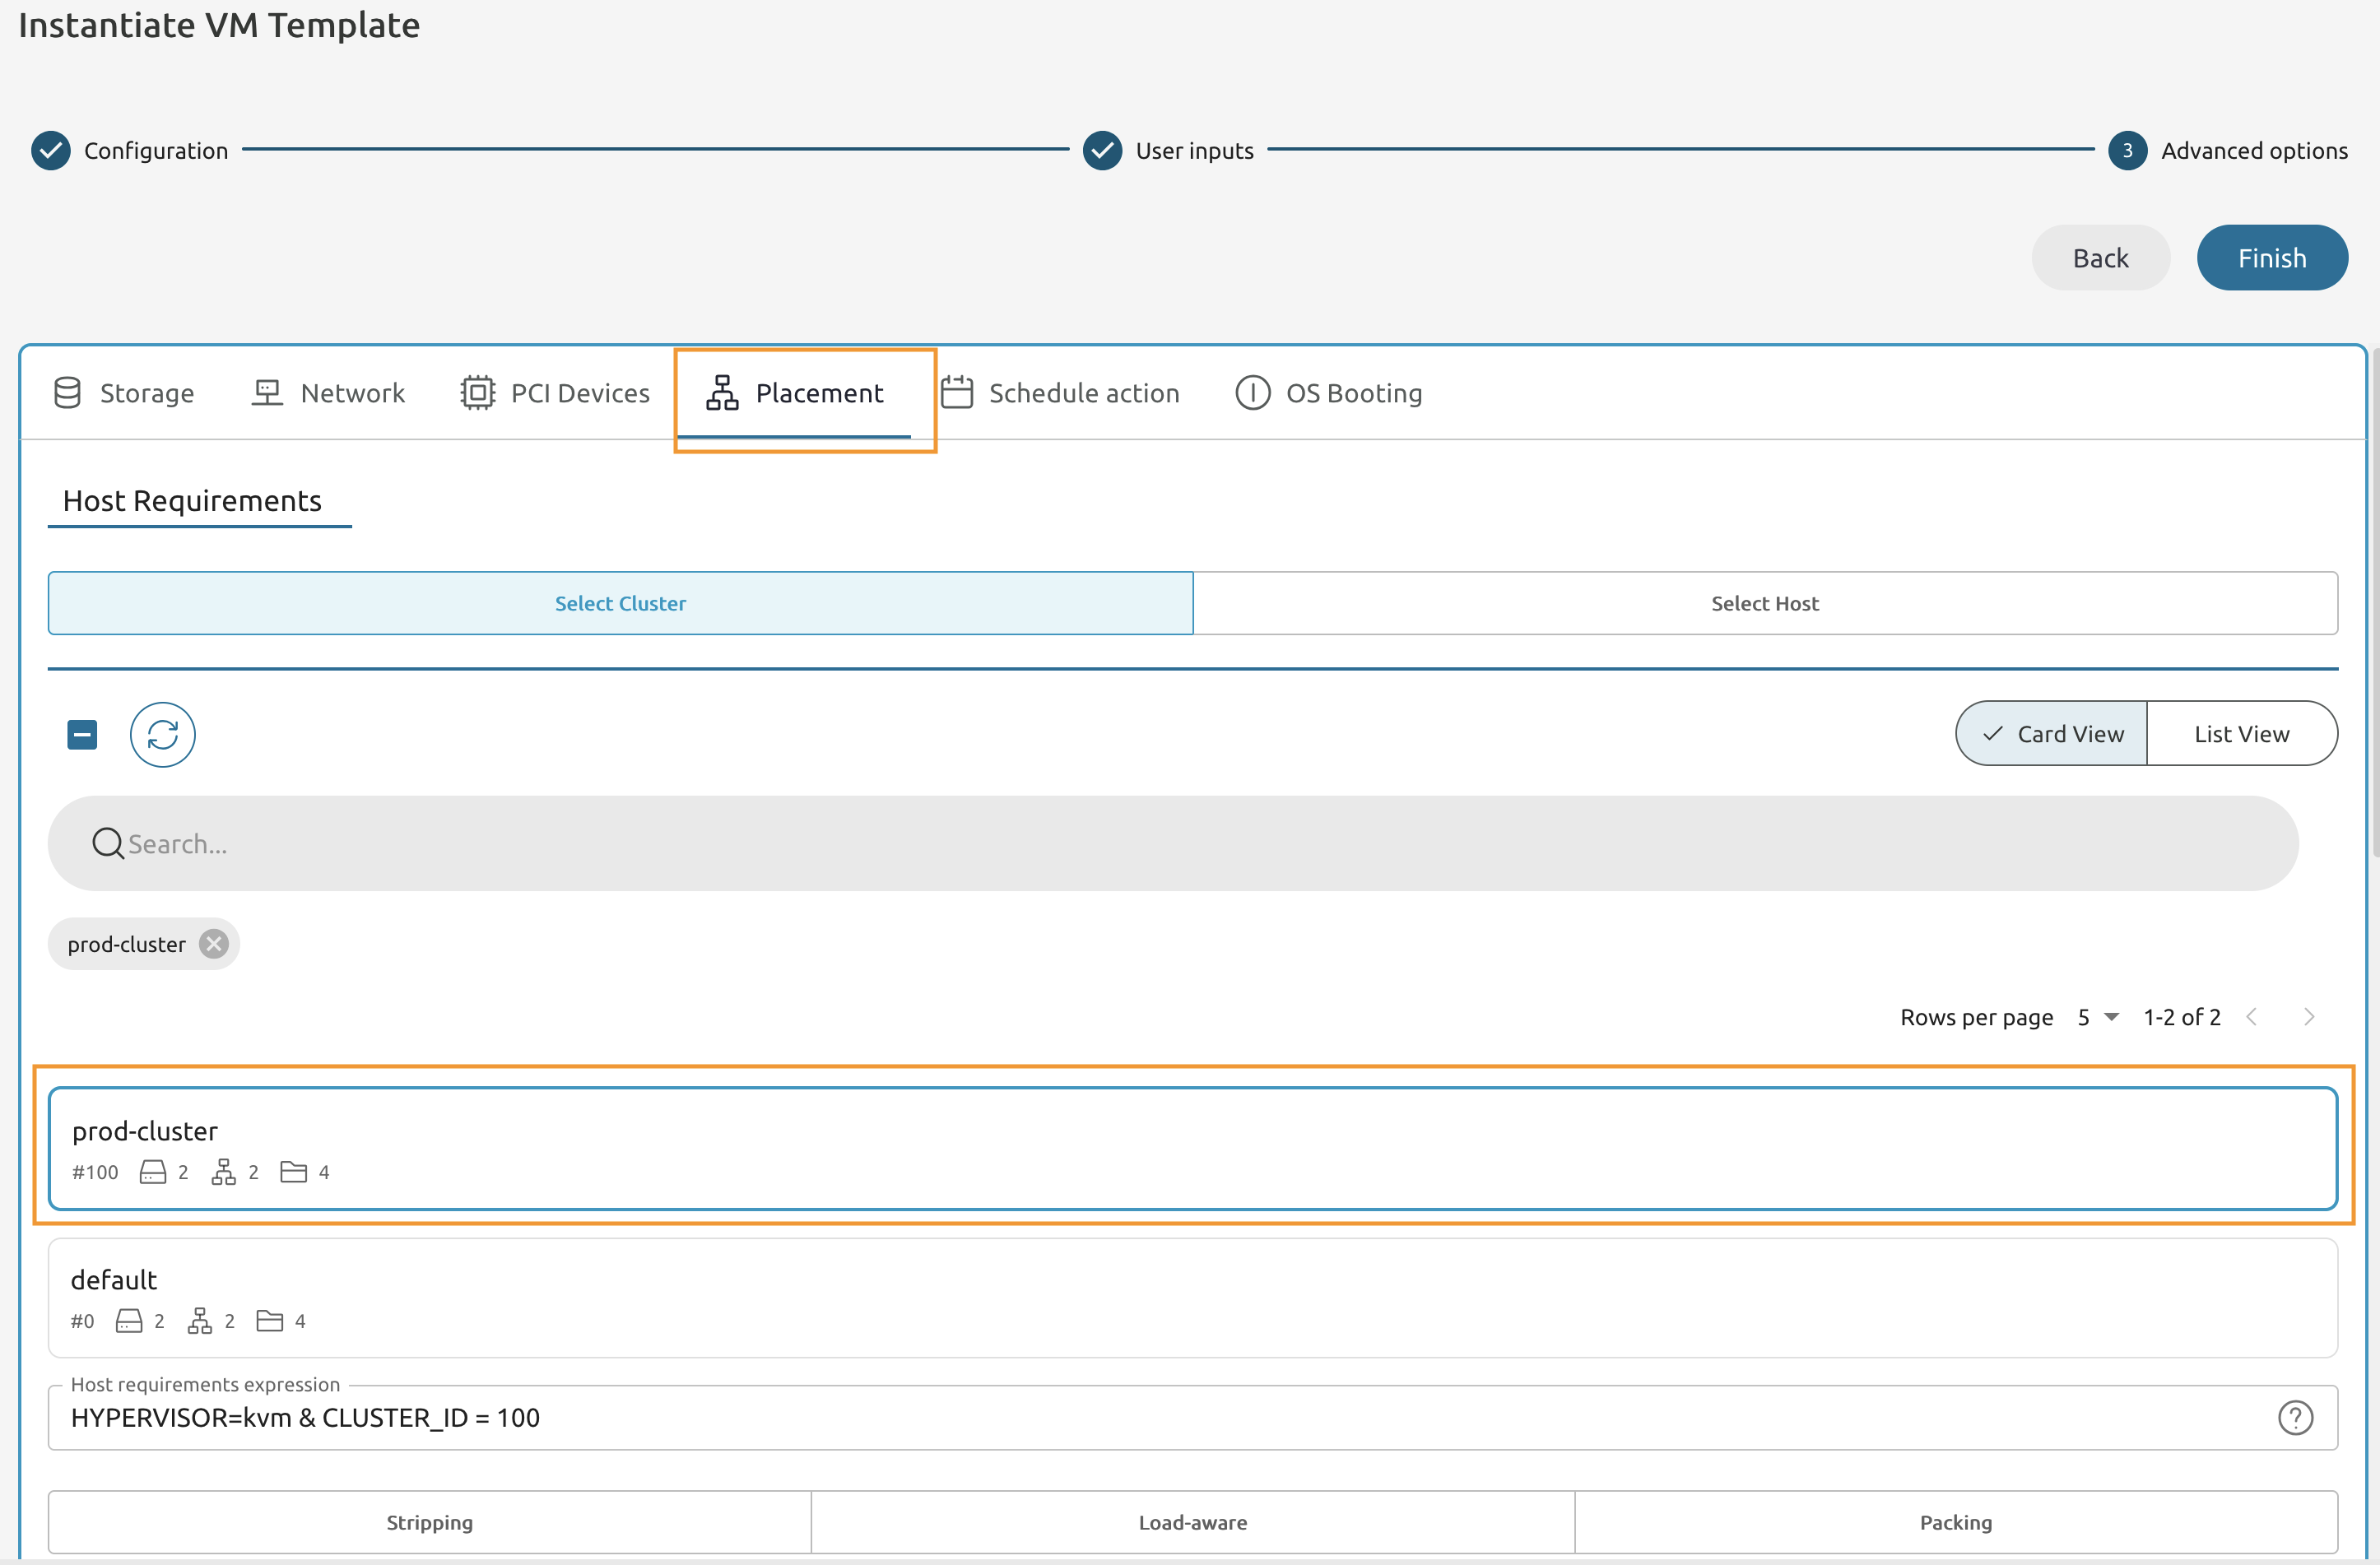
Switch to the Placement tab and select the prod-cluster cluster from the list.
8.3.5
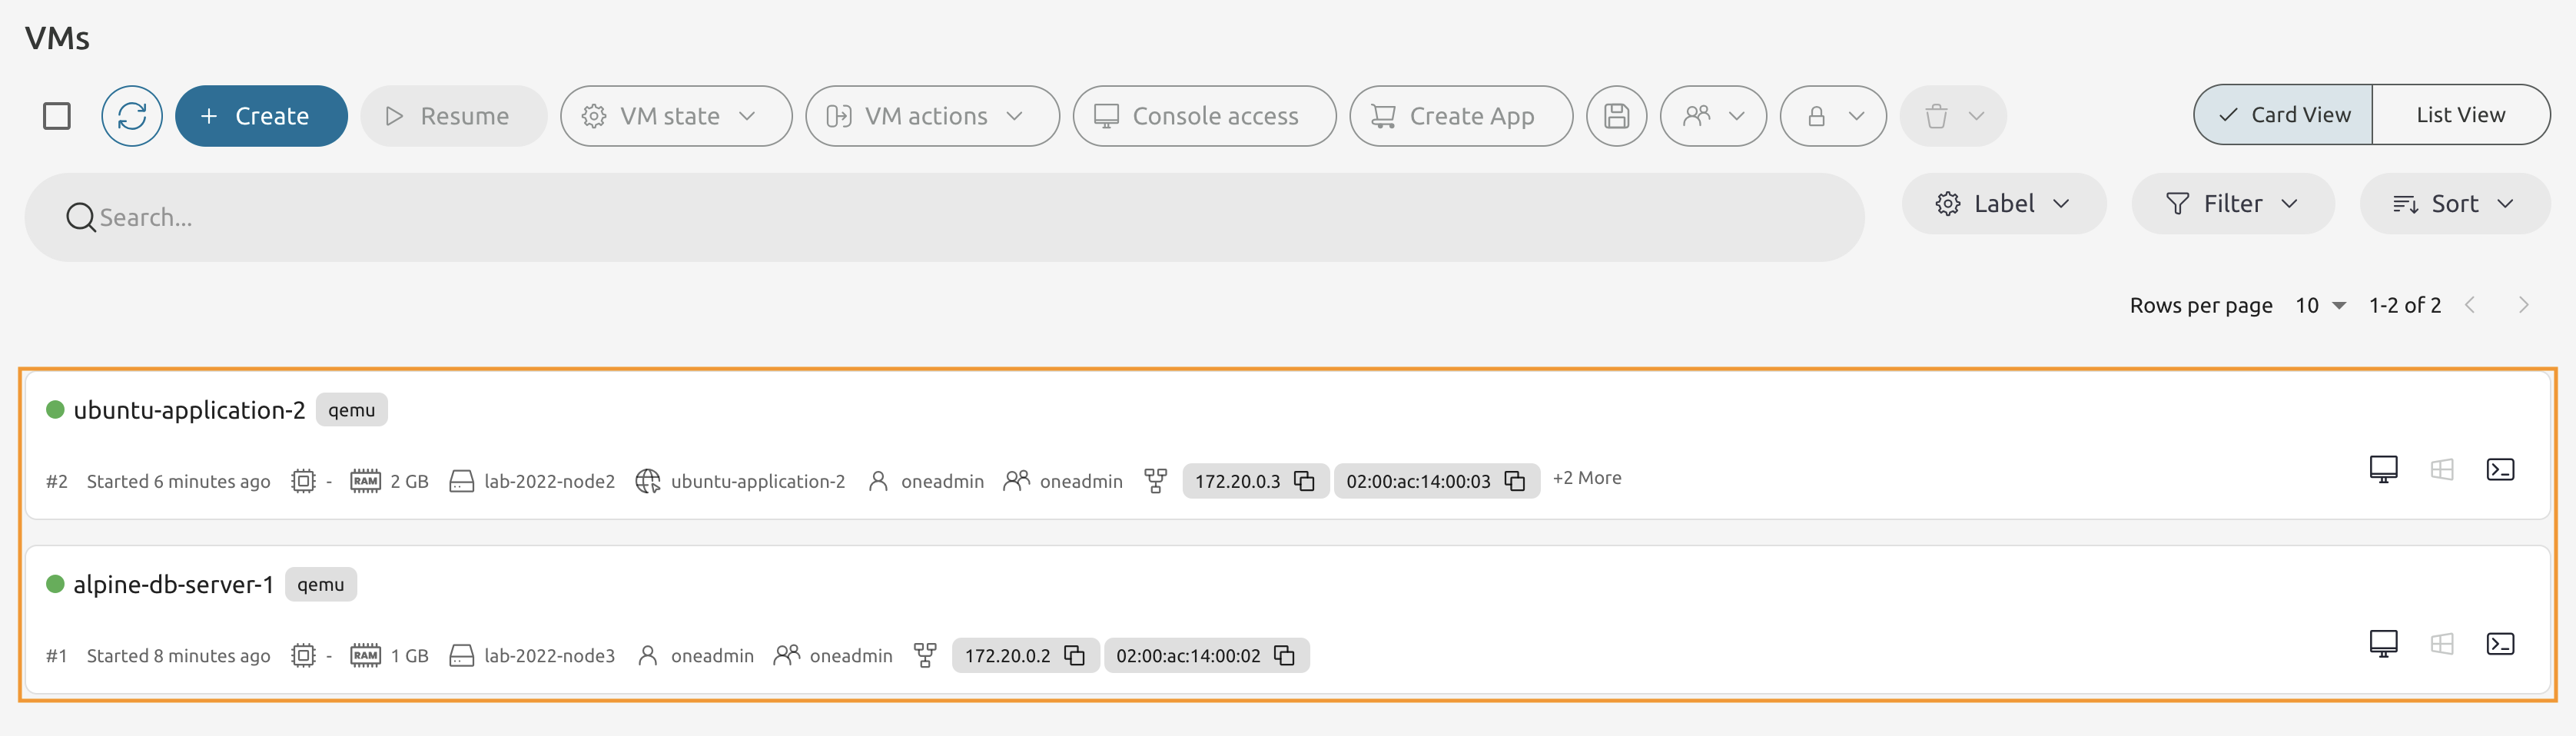
Make sure that the VM is running (status light lits Green).
Note the IP Address - you will need this in the future steps.

Deploy the Application VM.
8.3.6
On the VMs page press the *8Create** button.
8.3.7
From the VM Template list select the ubuntu-application VM Template.
8.3.8
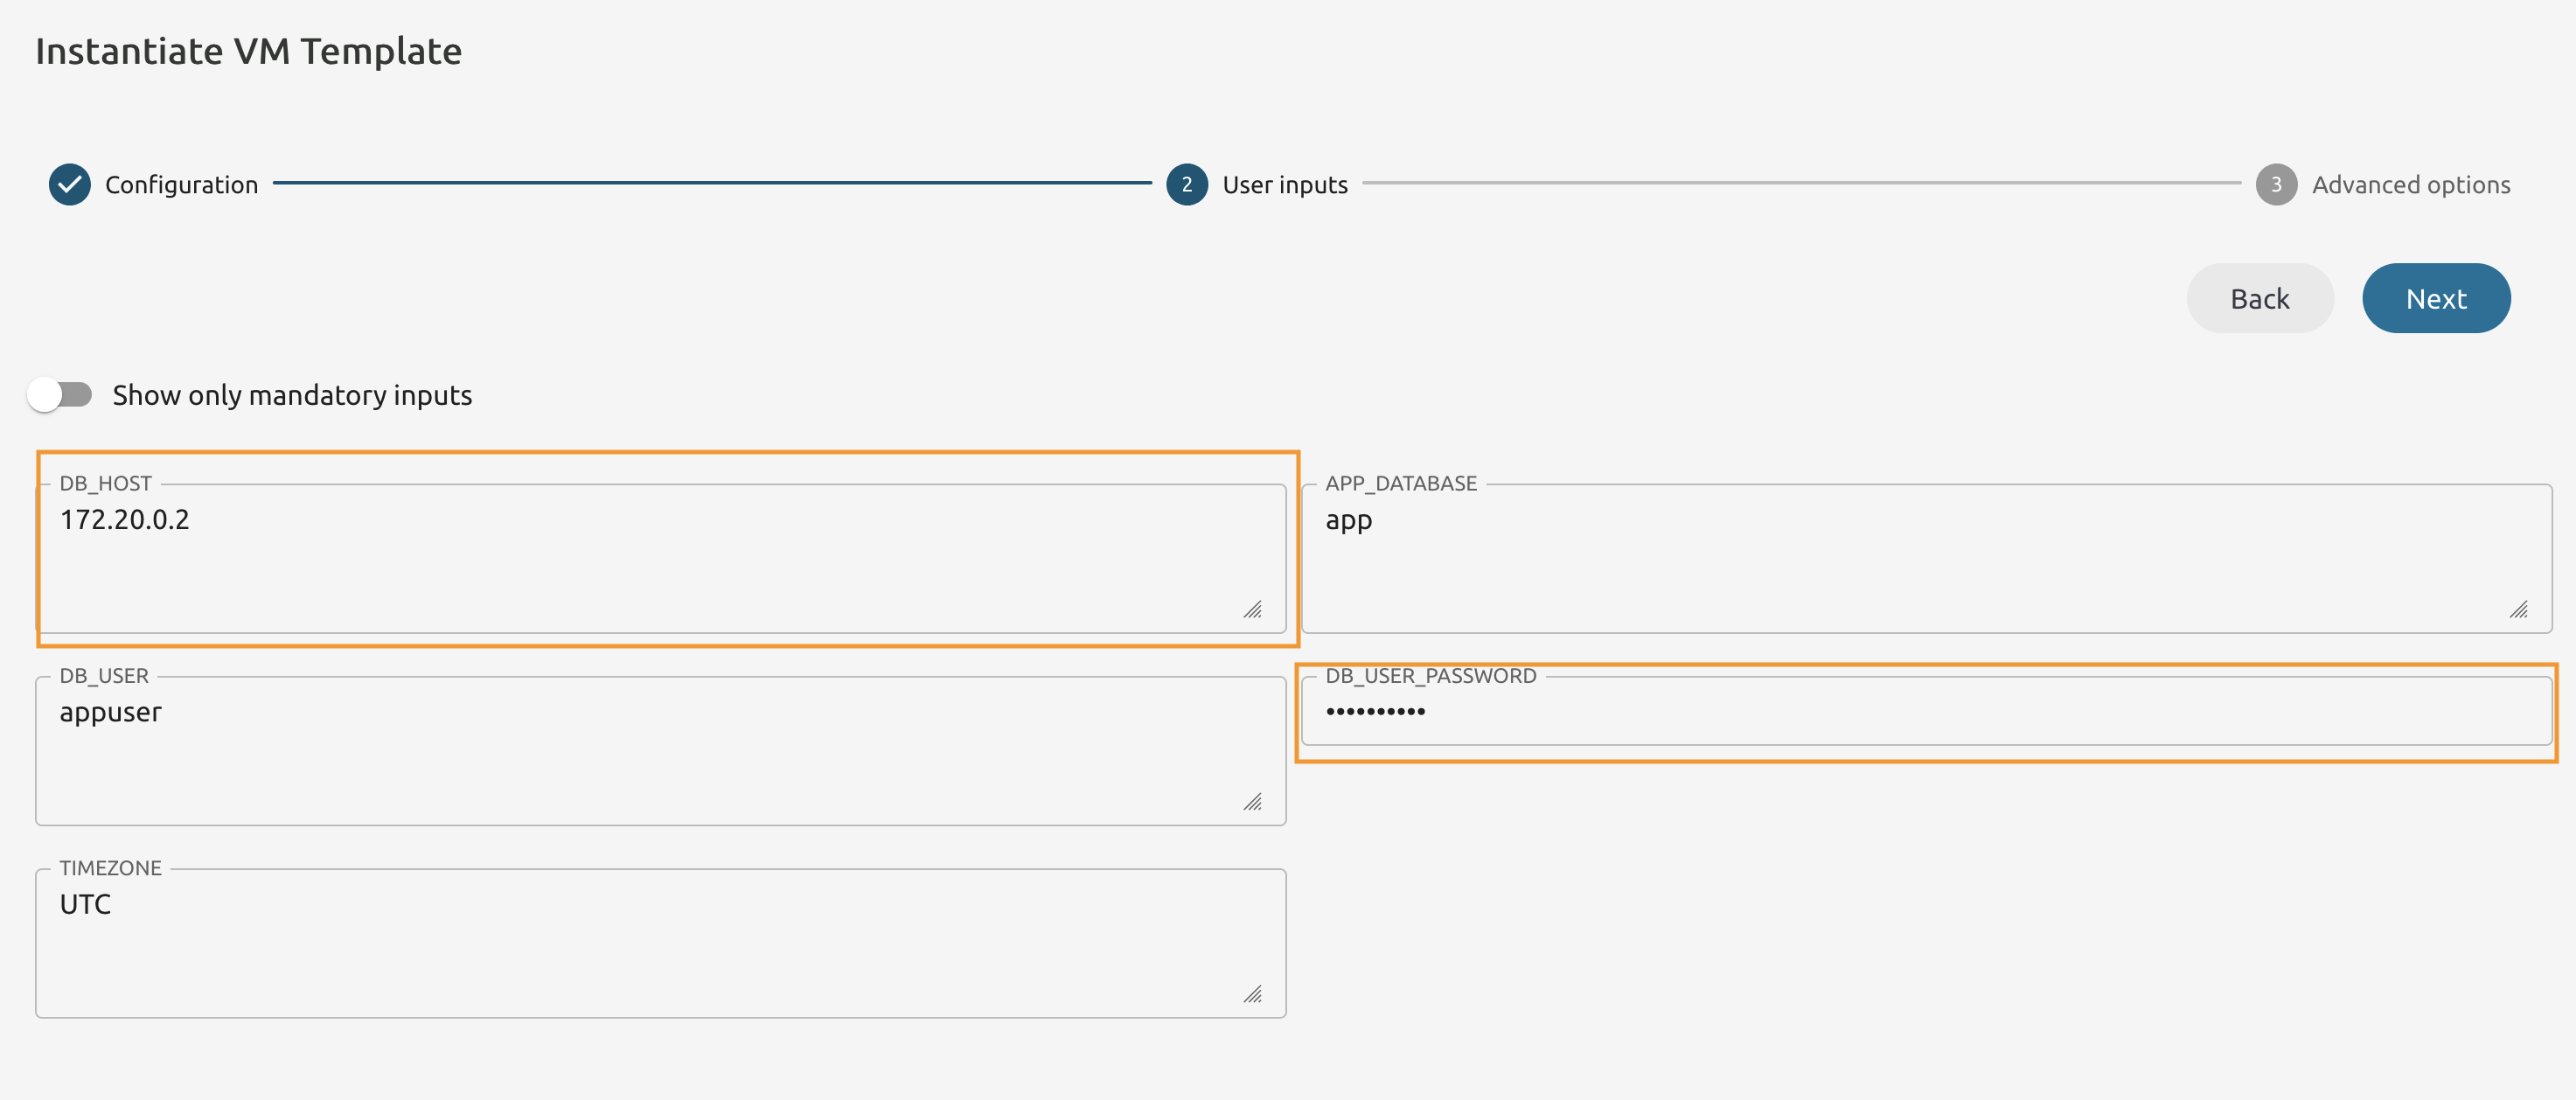
Keep the Configuration as is and proceed to the User inputs.
8.3.9
Set the DB_HOST to the IP Address of the alpine-db-server VM.
Set the DB_PASSWORD to appassword and leave rest as is.
8.3.10
Go to the Placement tab and set the cluster requirement to prod-cluster.
8.3.11
Wait until the newly deployed VM is running.
It may take some time to start the Ubuntu-based VM + there’s an internal sleep time to 60 seconds in the Start script. Return back in 5 minutes to proceed with the lab.
8.3.12
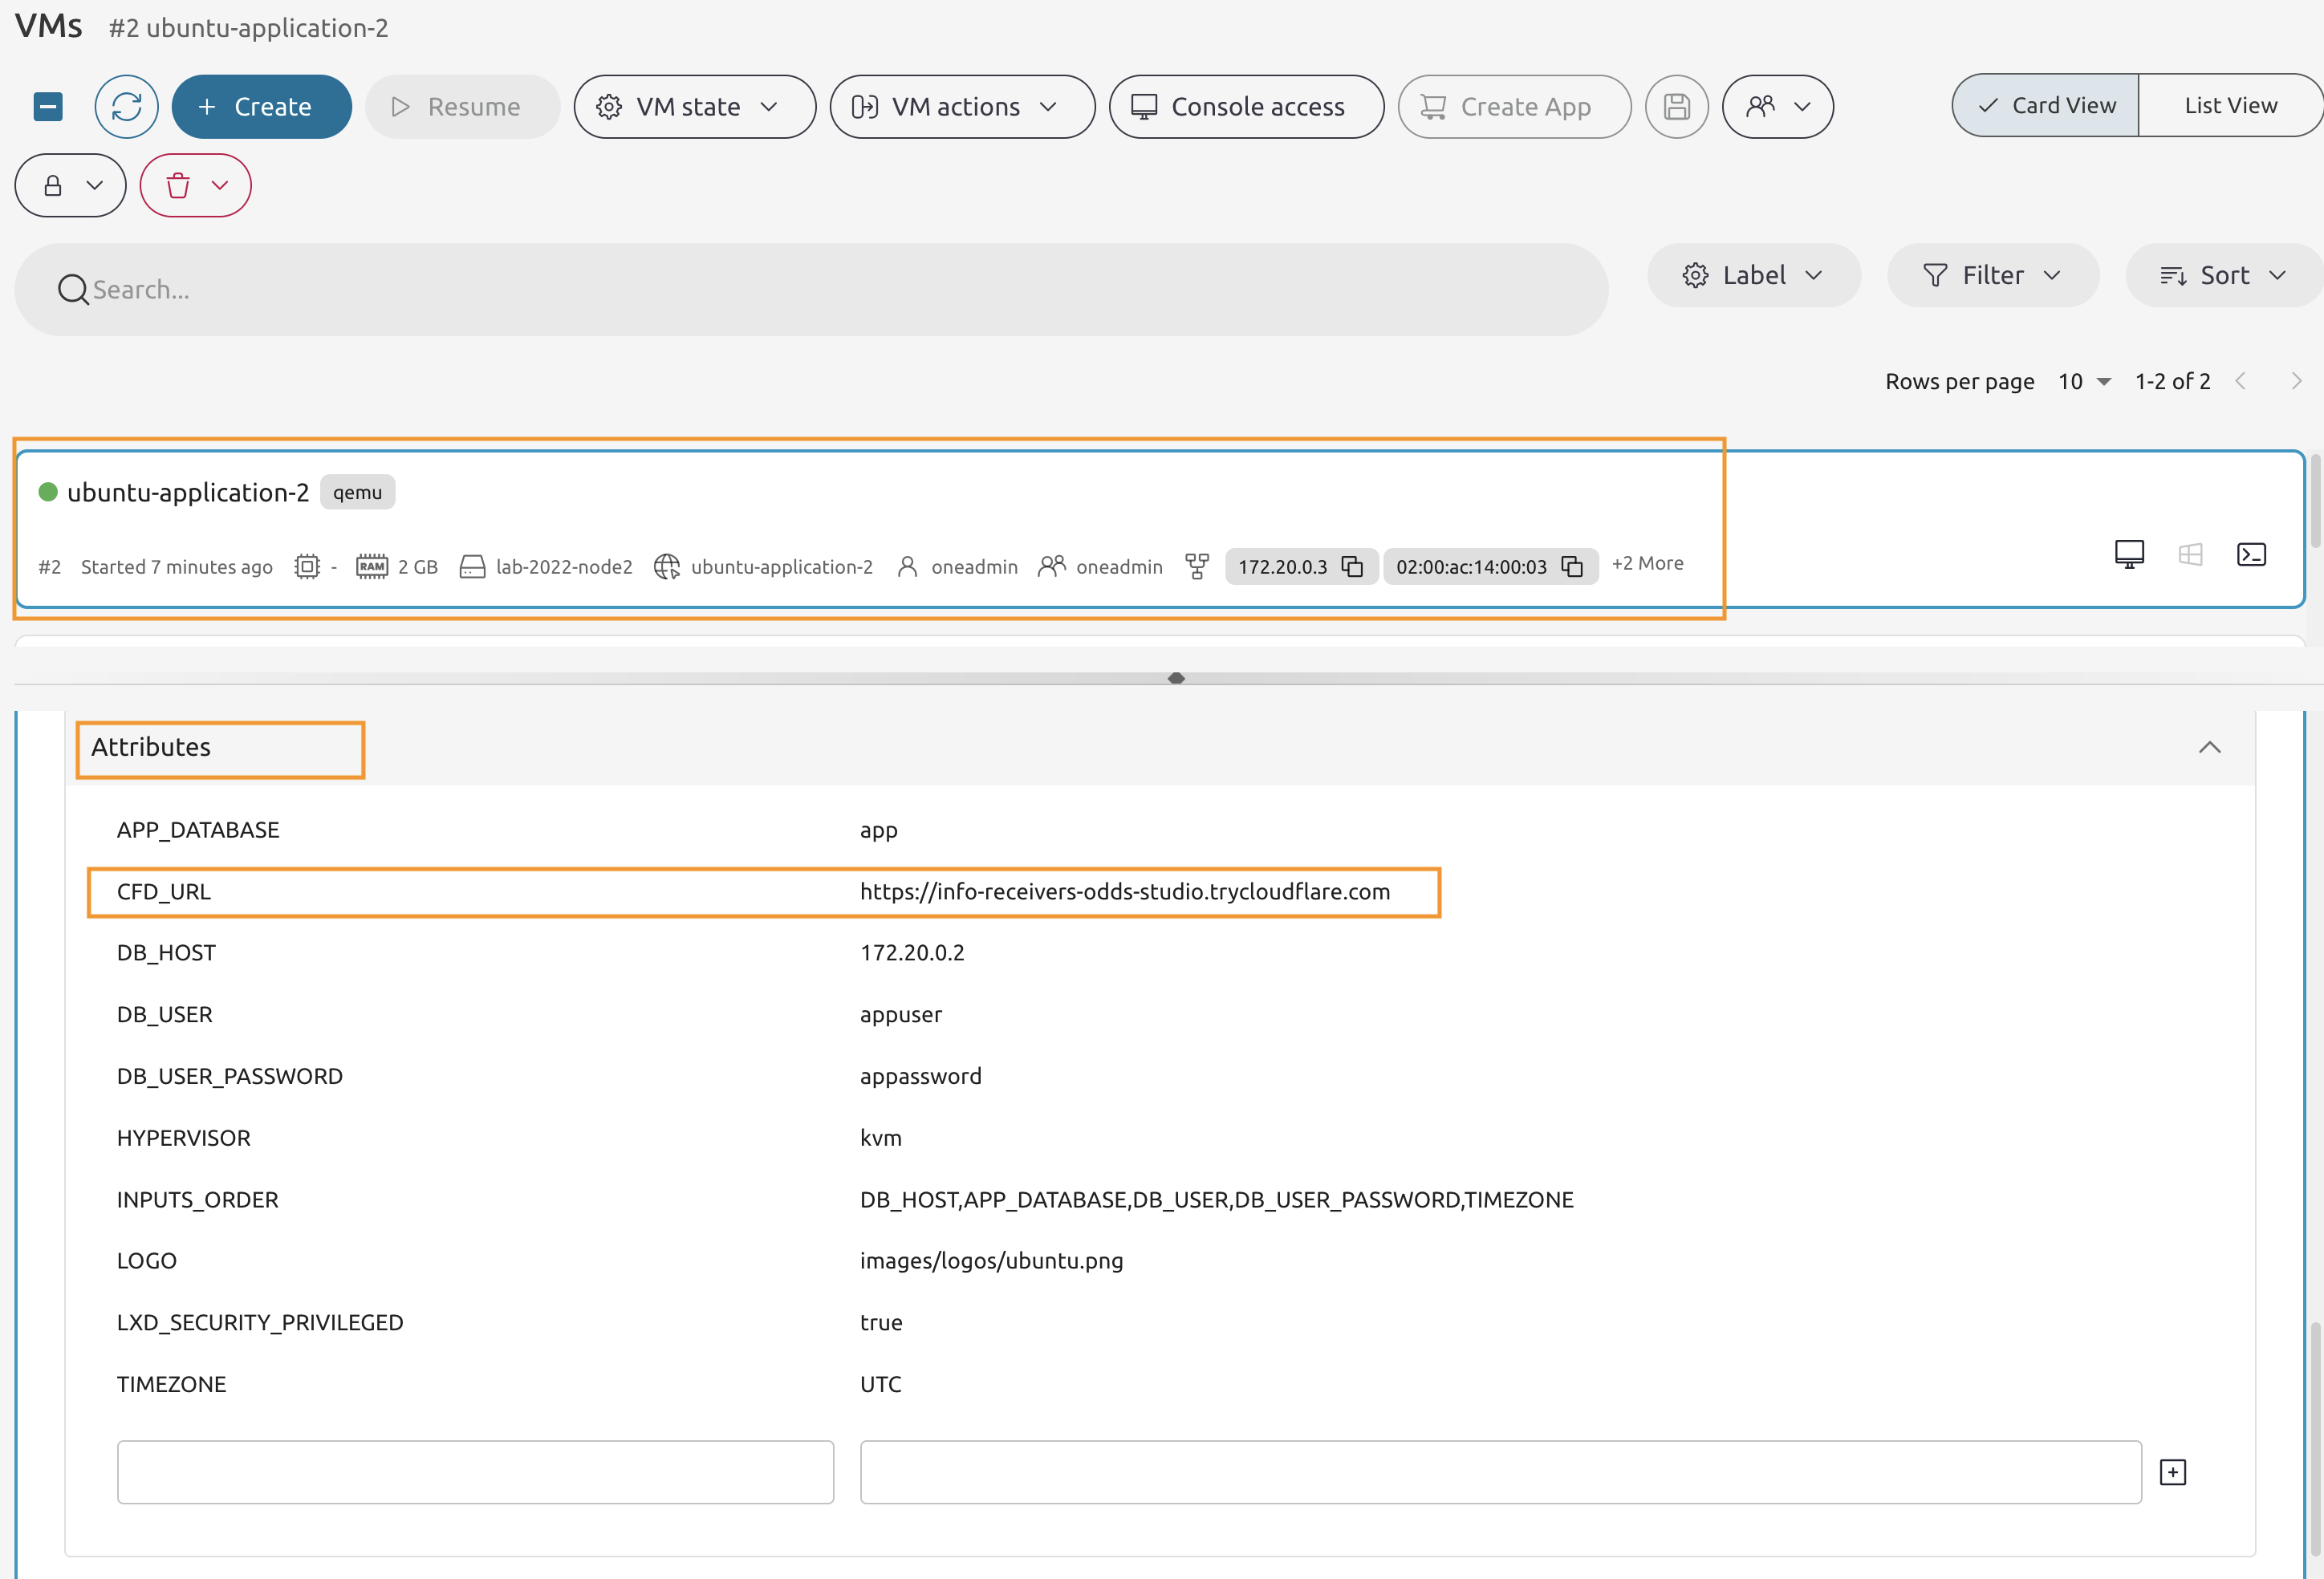
In the Attributes locate the CFD_URL attribute and copy the value.
Verify the deployed Application.
8.3.13
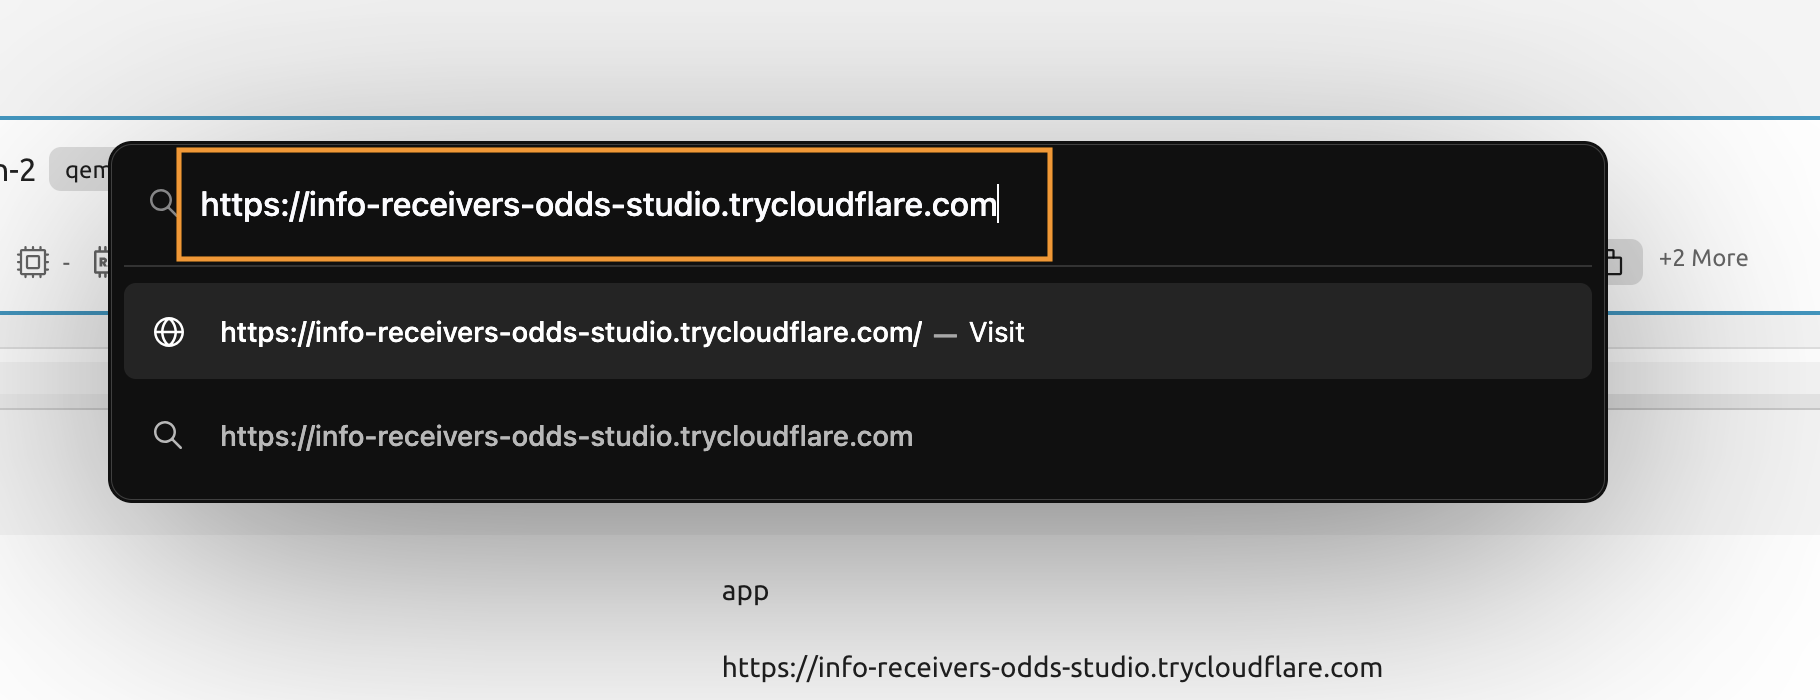
Open the URL in the new tab.
8.3.14
Make sure that the page is working and get yourself familiar with the instructions.
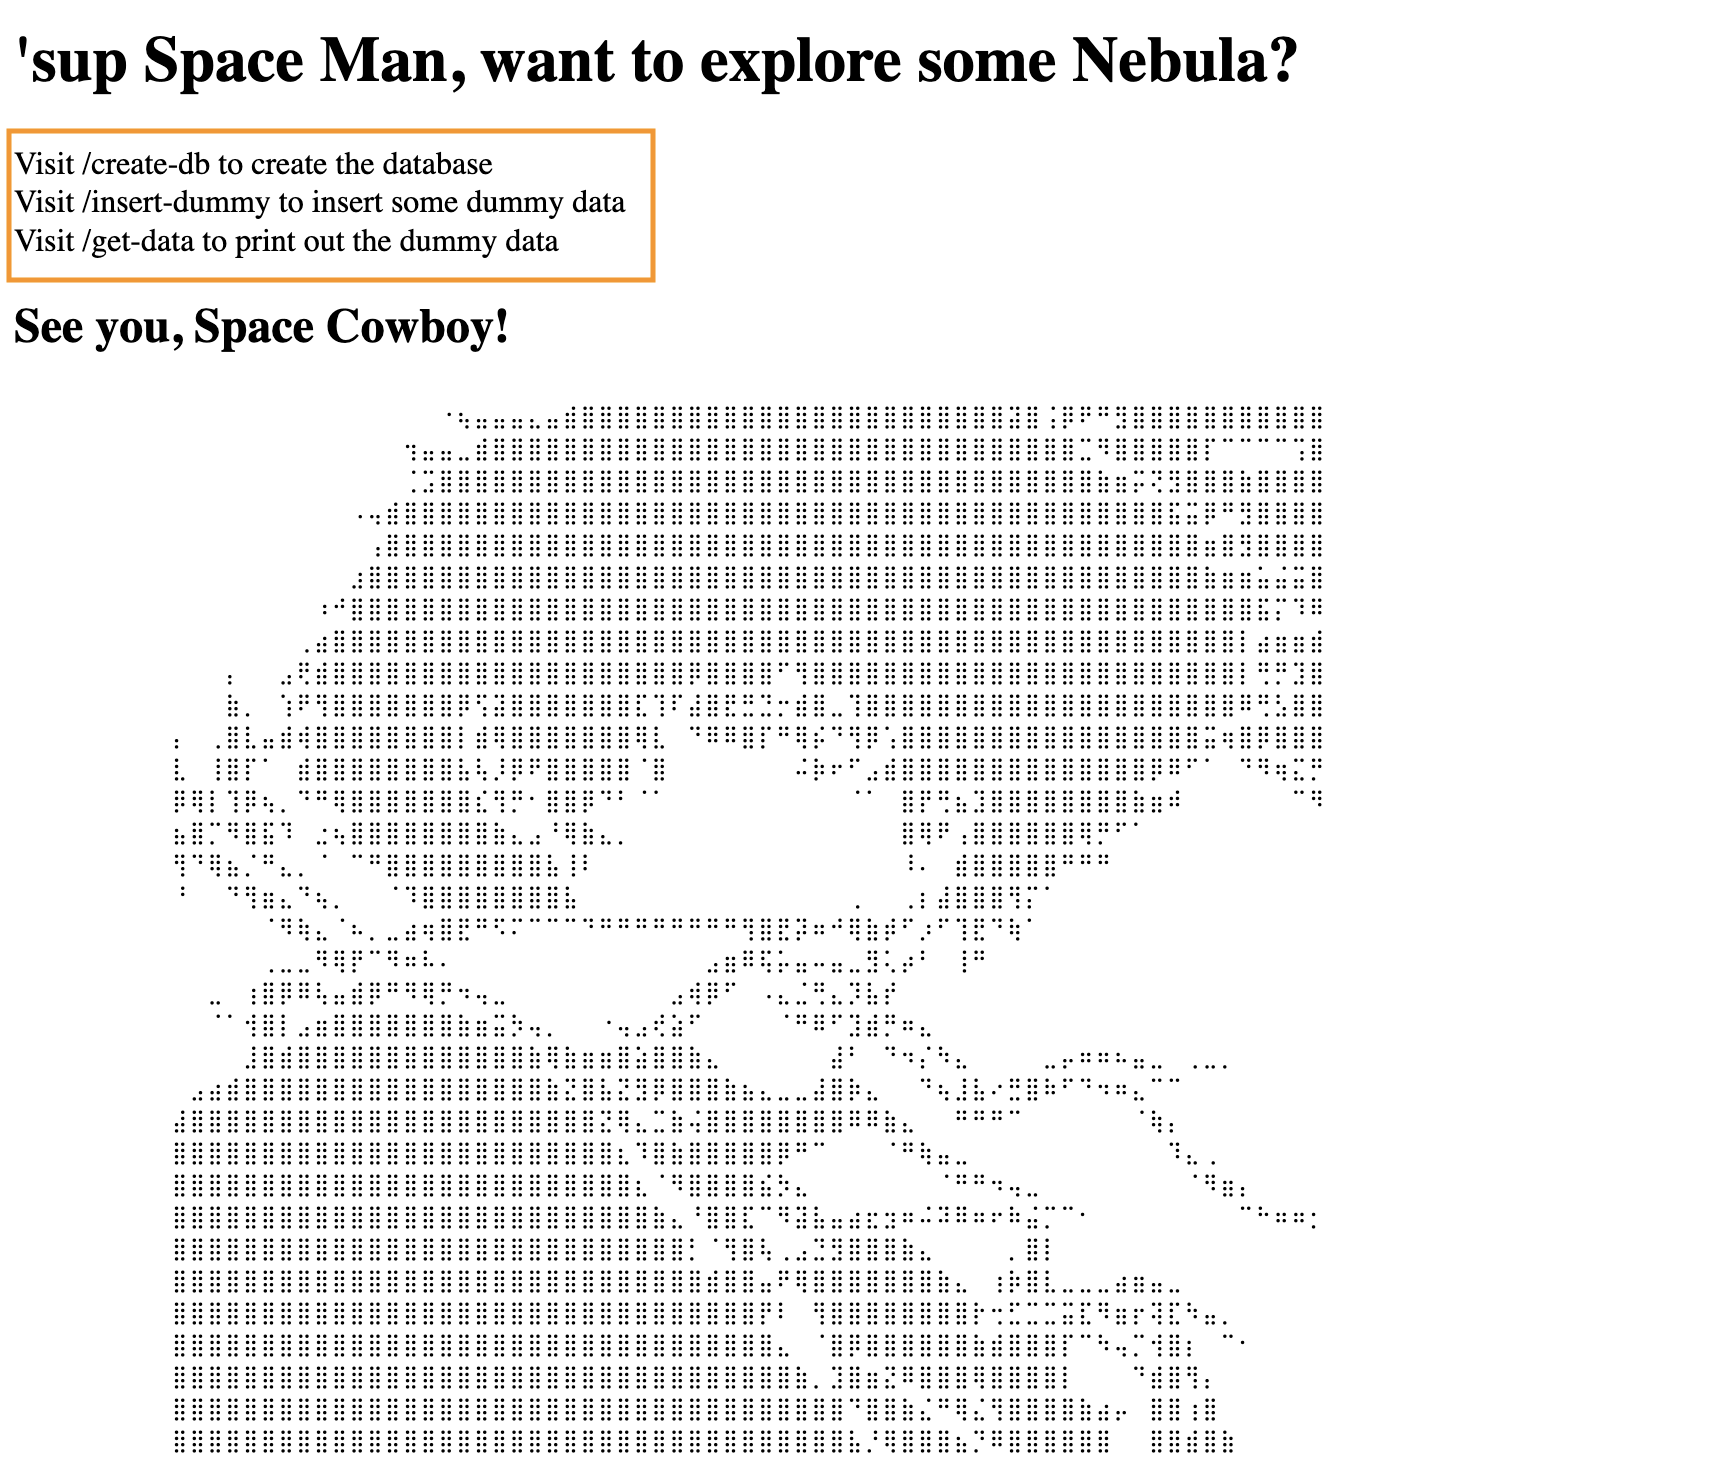
8.3.15
Visit the /create-db page to create the database.
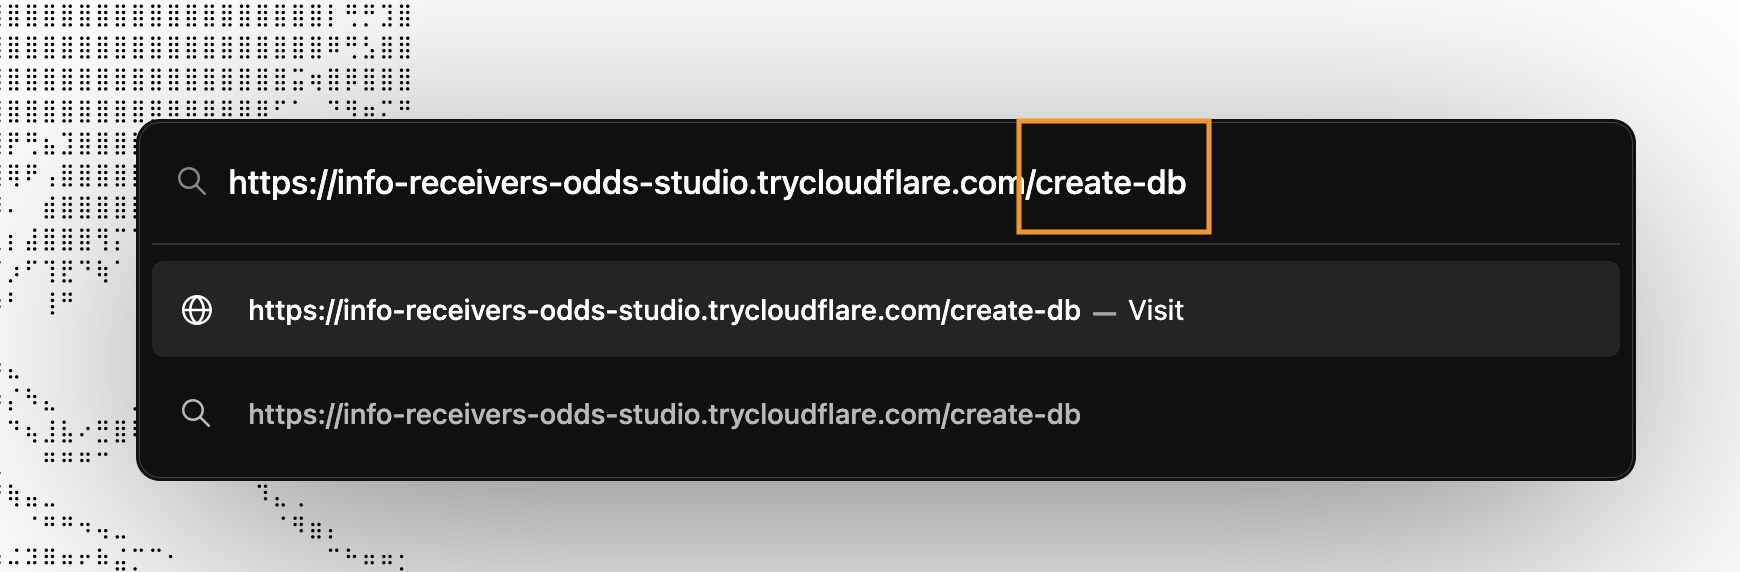
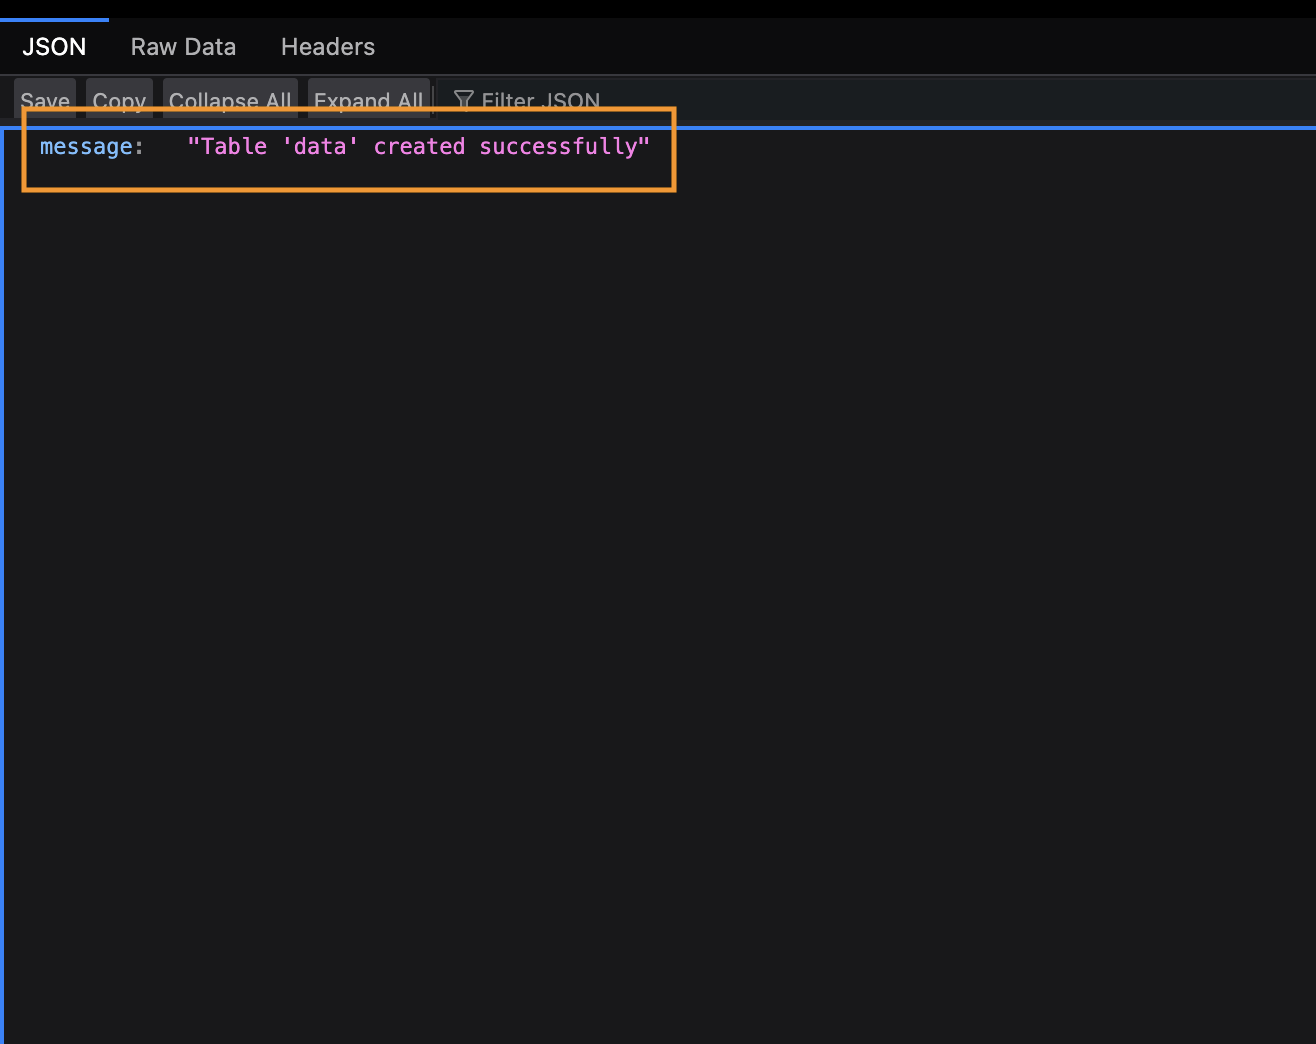
8.3.16
You must get the success message, otherwise stop and debug the connectivity between your VMs.
8.3.17
Now visit the /insert-dummy page.
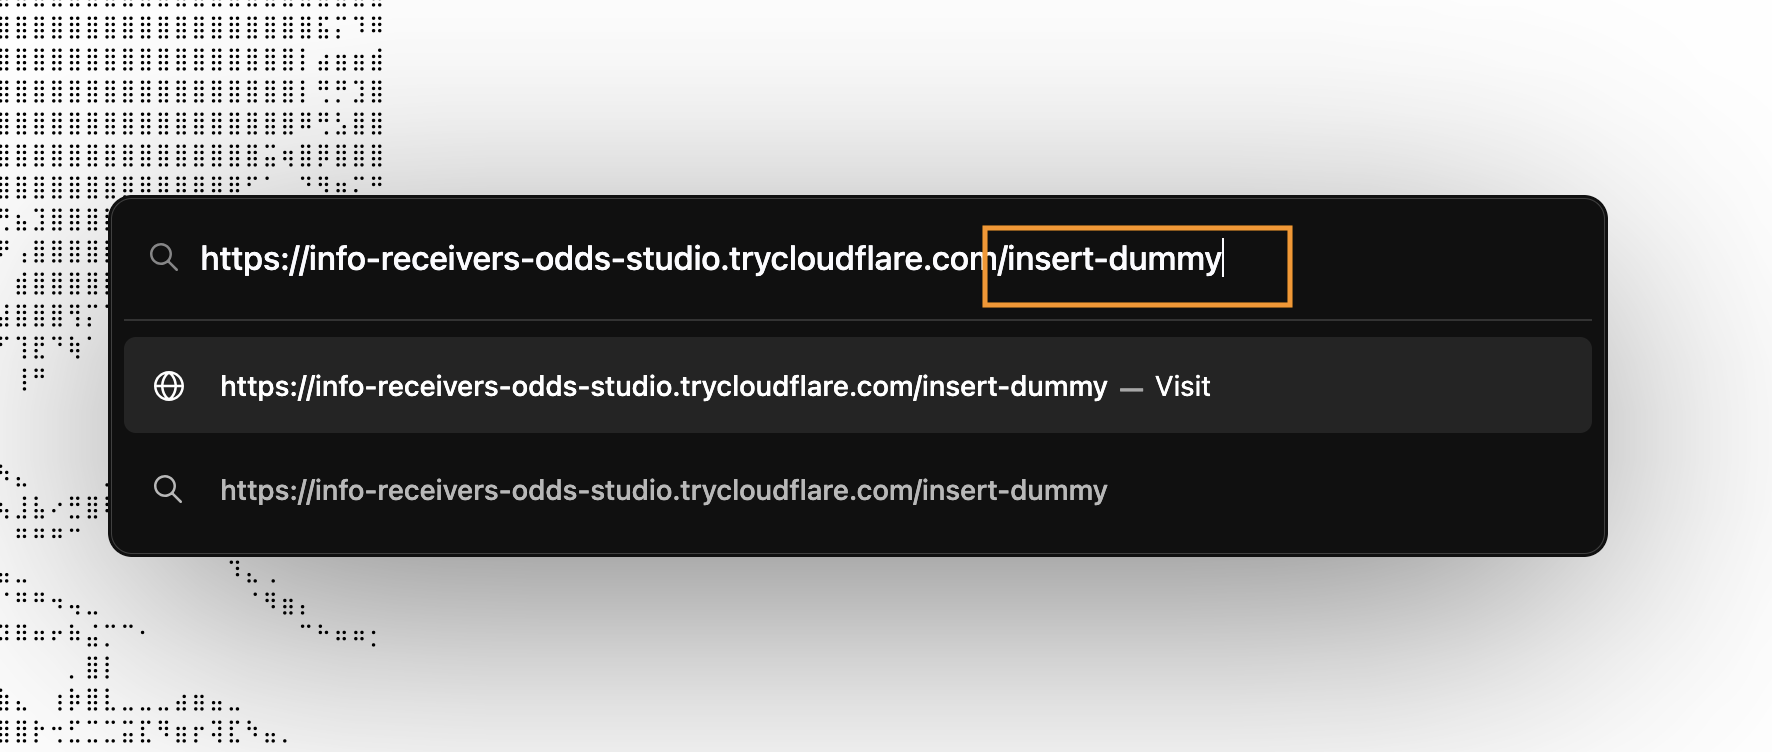
8.3.18
Refresh the page 3 to 4 times to generate more of the dummy data.
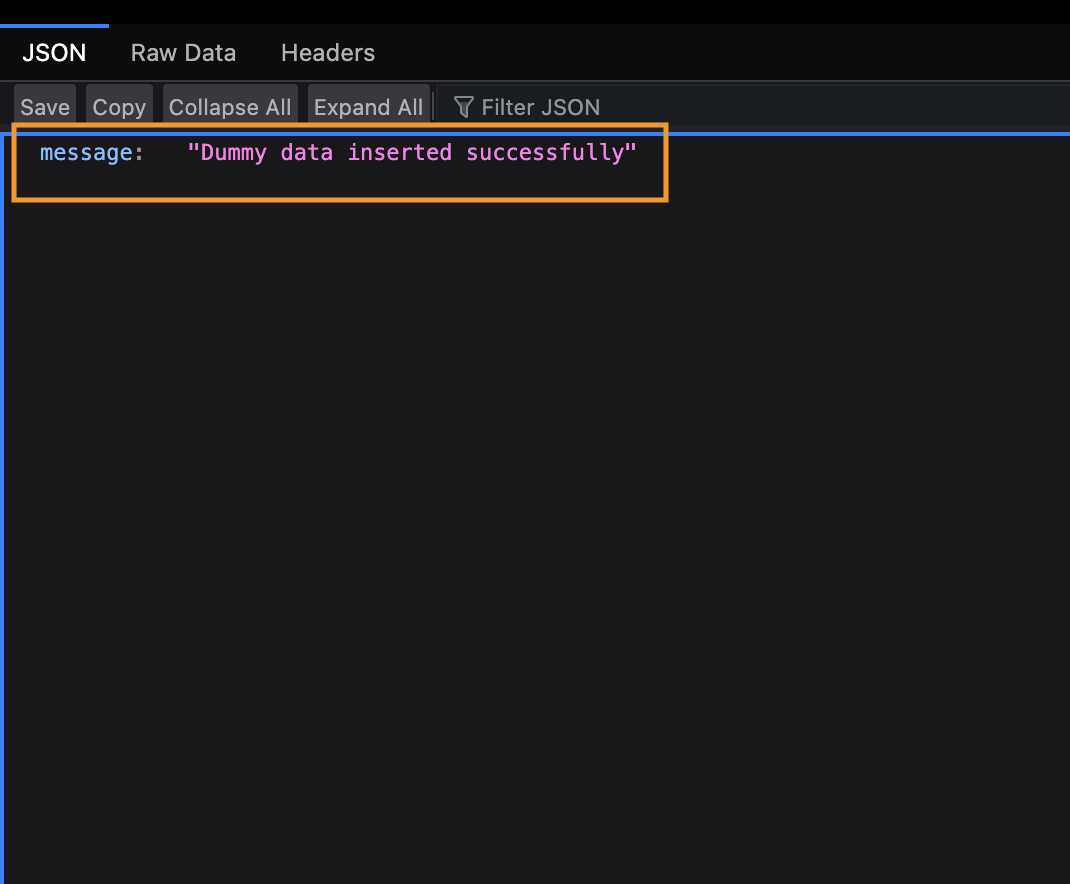
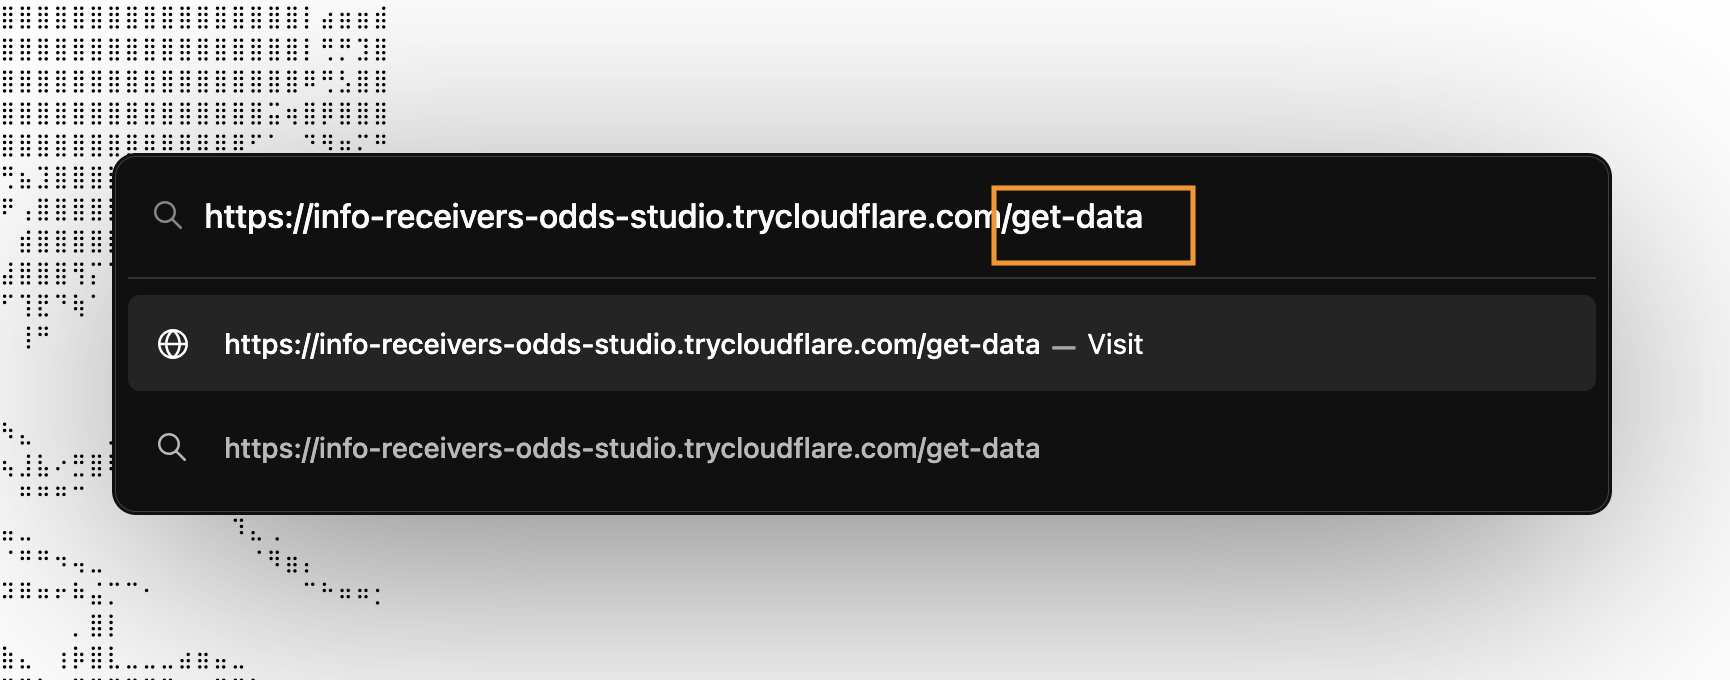
8.3.19
Now visit the /get-data page to print the contents of the database.
8.3.20
Your data must be printed.
