Module 3 - Lab 1 : Create a Custom View
Table of Contents
Expand to access the In-page navigation
Objective(-s):
- Create a Custom View.
- Update the “attendees” to use the custom view.
- Verify the custom view.
Create a Custom View.
3.1.1
From the Node 1’s Command Line login as root and go to the views directory.
sudo su
cd /etc/one/fireedge/sunstone/views/
Copy the “user” view.
cp -R user/ limited_user
3.1.2
Enter the newly created view directory and remove views.
cd limited_user/
rm -f sec-group-tab.yaml vnet-tab.yaml
ls -lh

total 28K
-rw-r--r-- 1 root root  885 Apr 15 10:13 backup-tab.yaml
-rw-r--r-- 1 root root  884 Apr 15 10:13 file-tab.yaml
-rw-r--r-- 1 root root 1.2K Apr 15 10:13 image-tab.yaml
-rw-r--r-- 1 root root 1.1K Apr 15 10:13 marketplace-app-tab.yaml
-rw-r--r-- 1 root root 1.2K Apr 15 10:13 service-tab.yaml
-rw-r--r-- 1 root root 2.7K Apr 15 10:13 vm-tab.yaml
-rw-r--r-- 1 root root 1.9K Apr 15 10:13 vm-template-tab.yaml
3.1.3
Go one level up and edit the sunstone-views.conf file.
cd ../
vi sunstone-views.yaml
Under the views add the following code.
views:
    ...
    limited_user:
        name: "Limited View"
        description: "A trimmed-down User view"
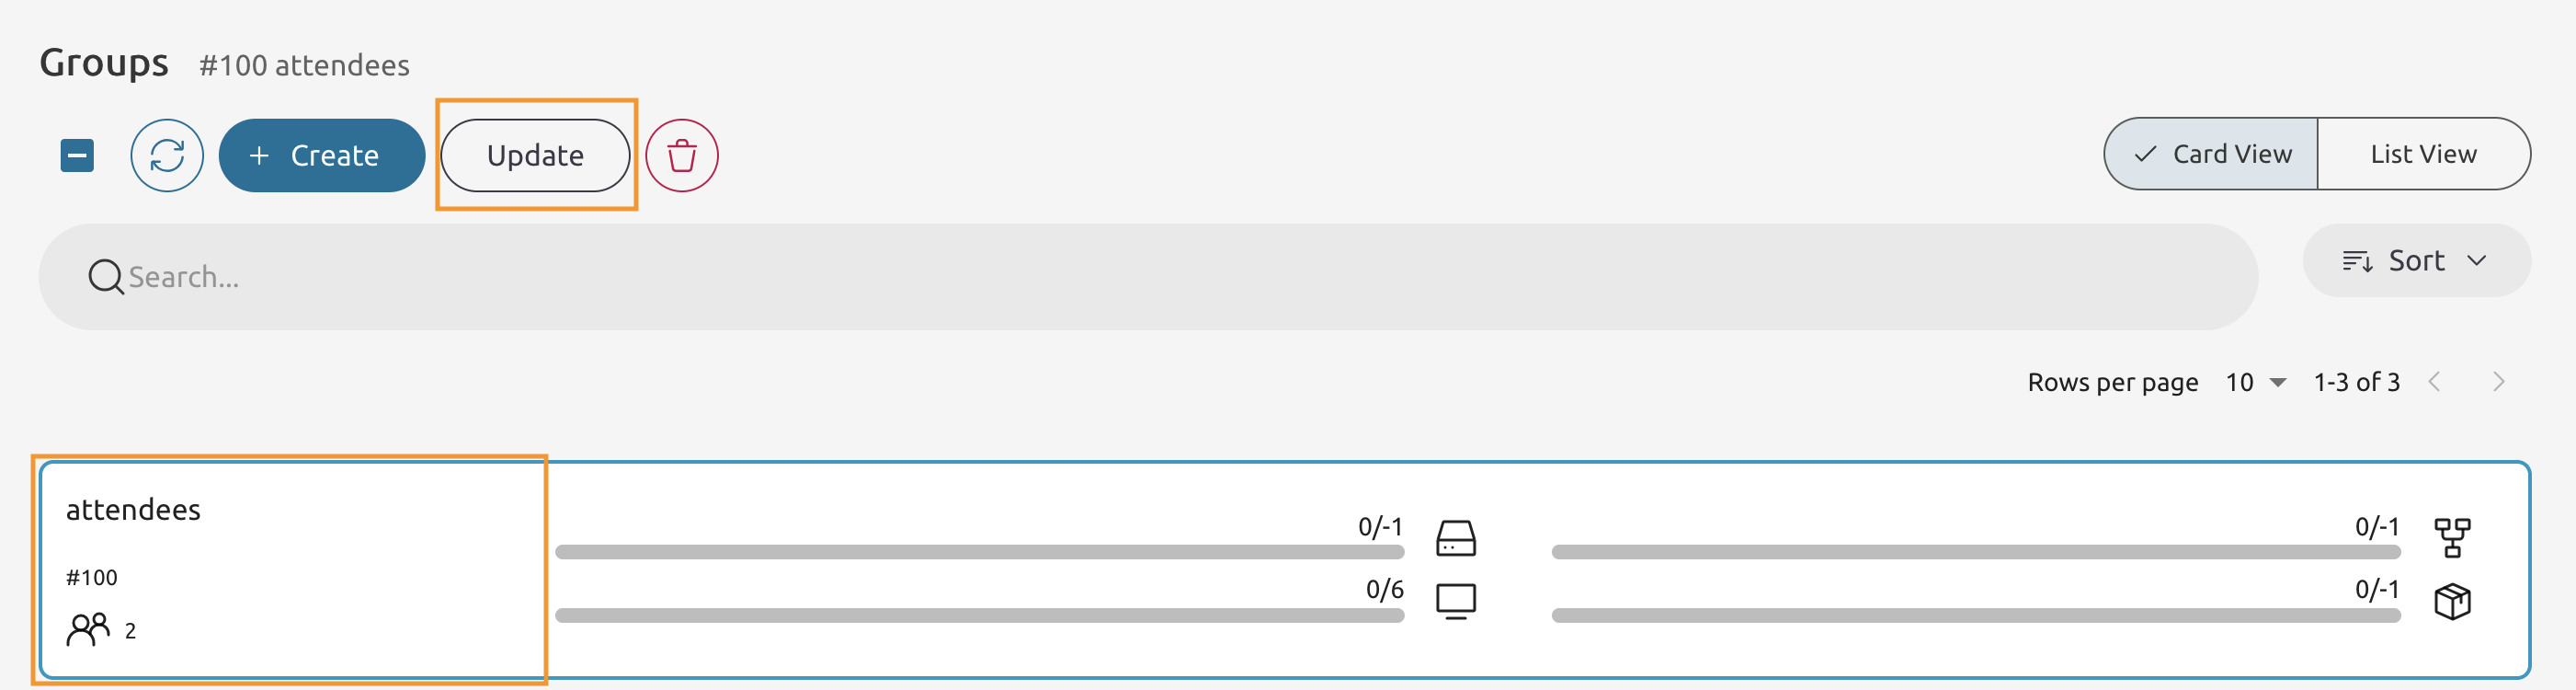
Update the “attendees” to use the custom view.
3.1.4
Return to Sunstone’s Groups tab and press the Update button.
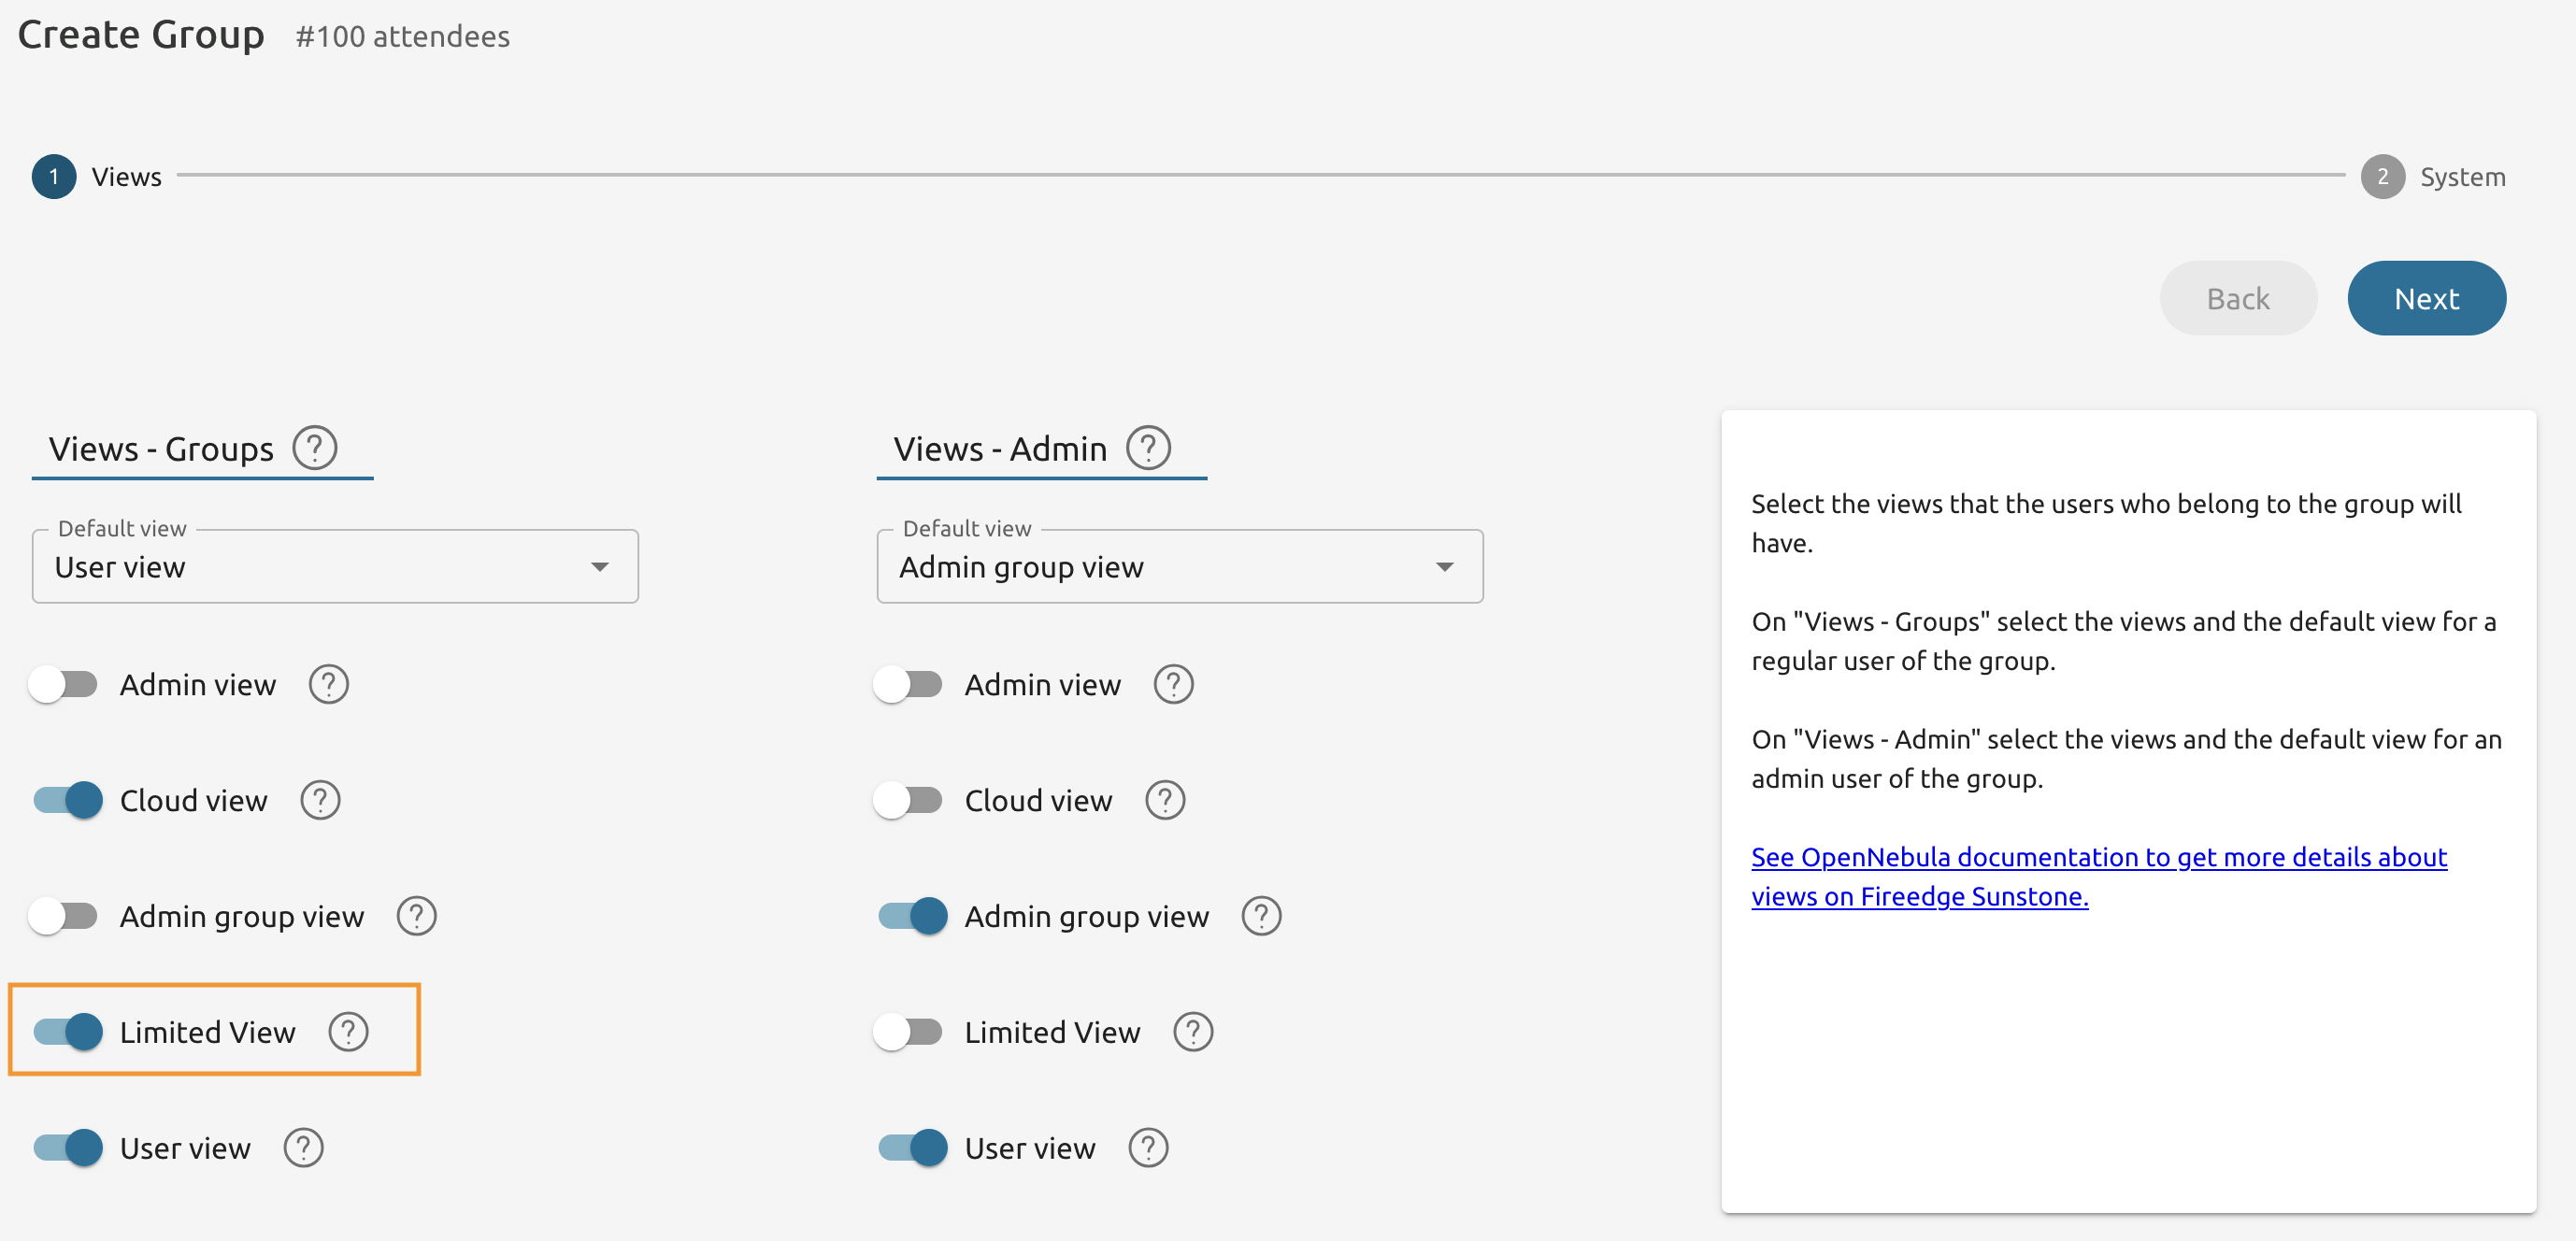
3.1.5
Toggle the Limited View and press Next.
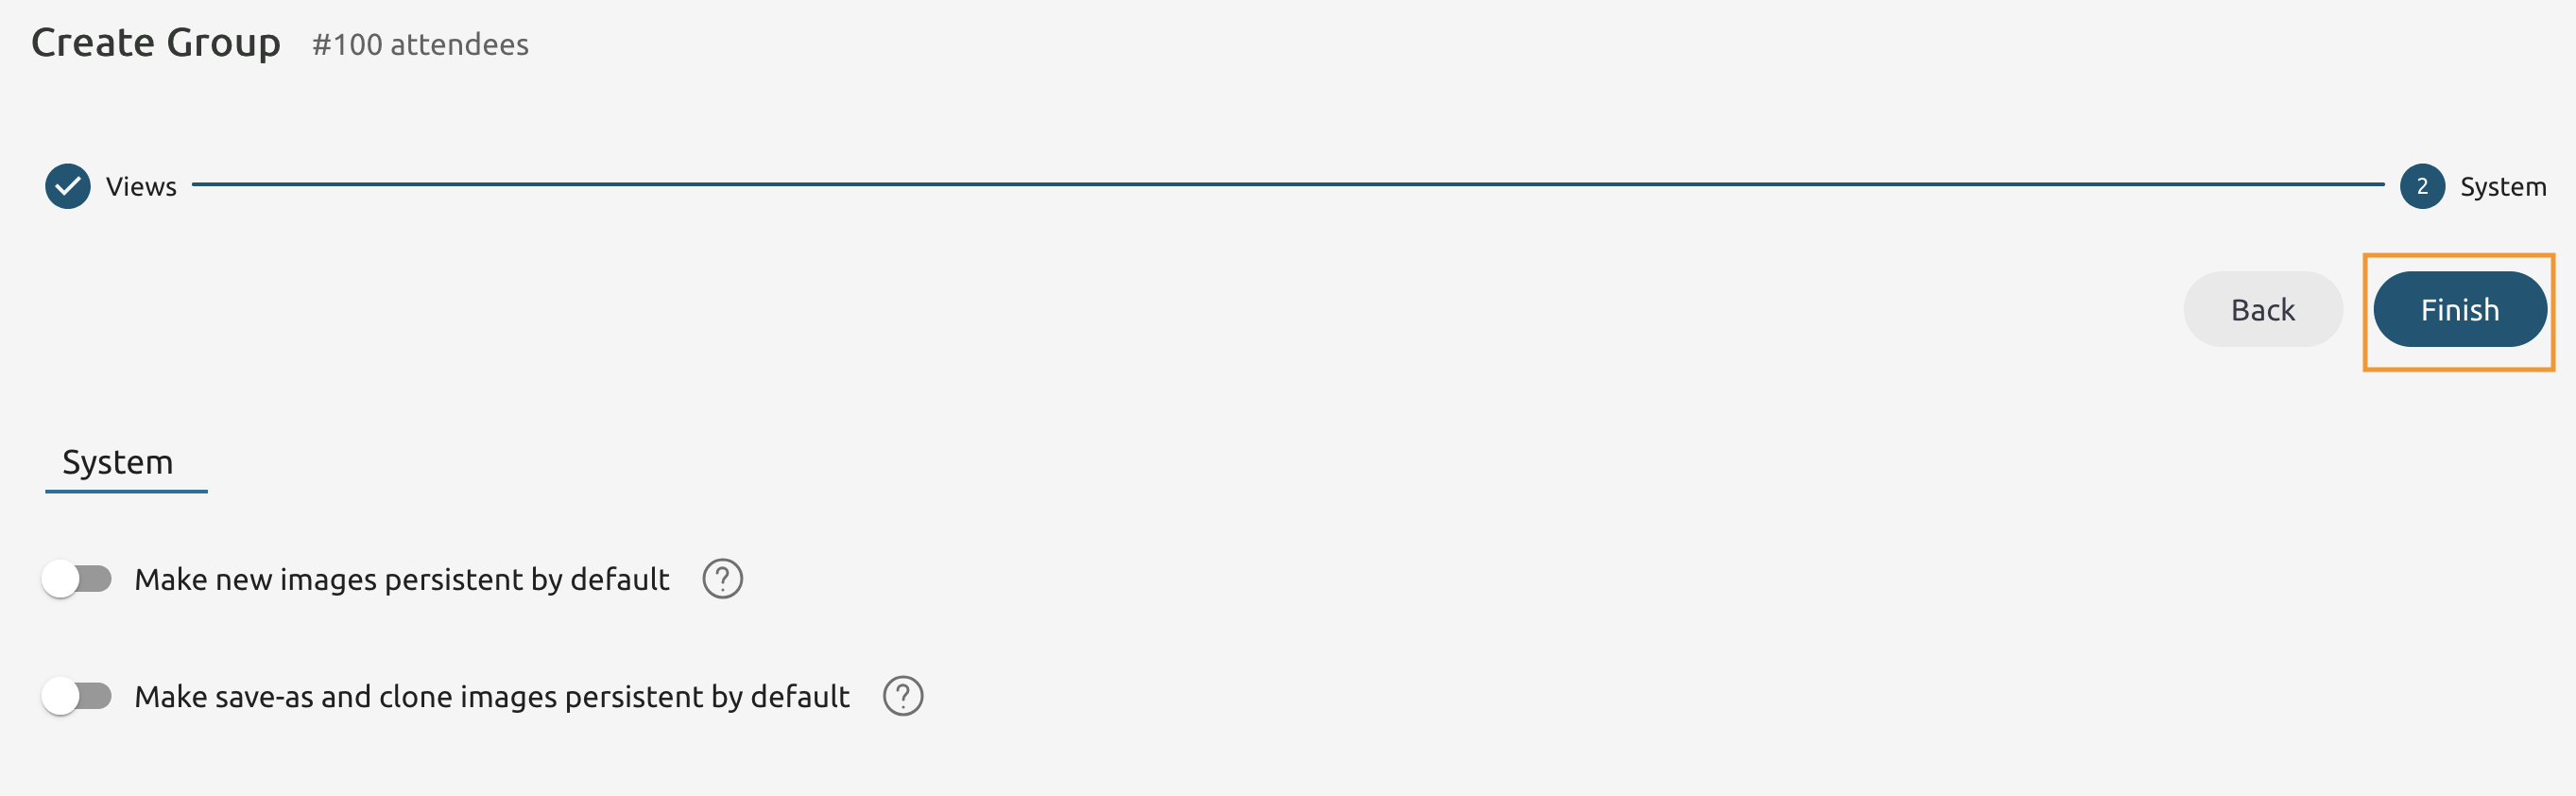
3.1.6
Press Finish.
3.1.7
Login as attendee-user.
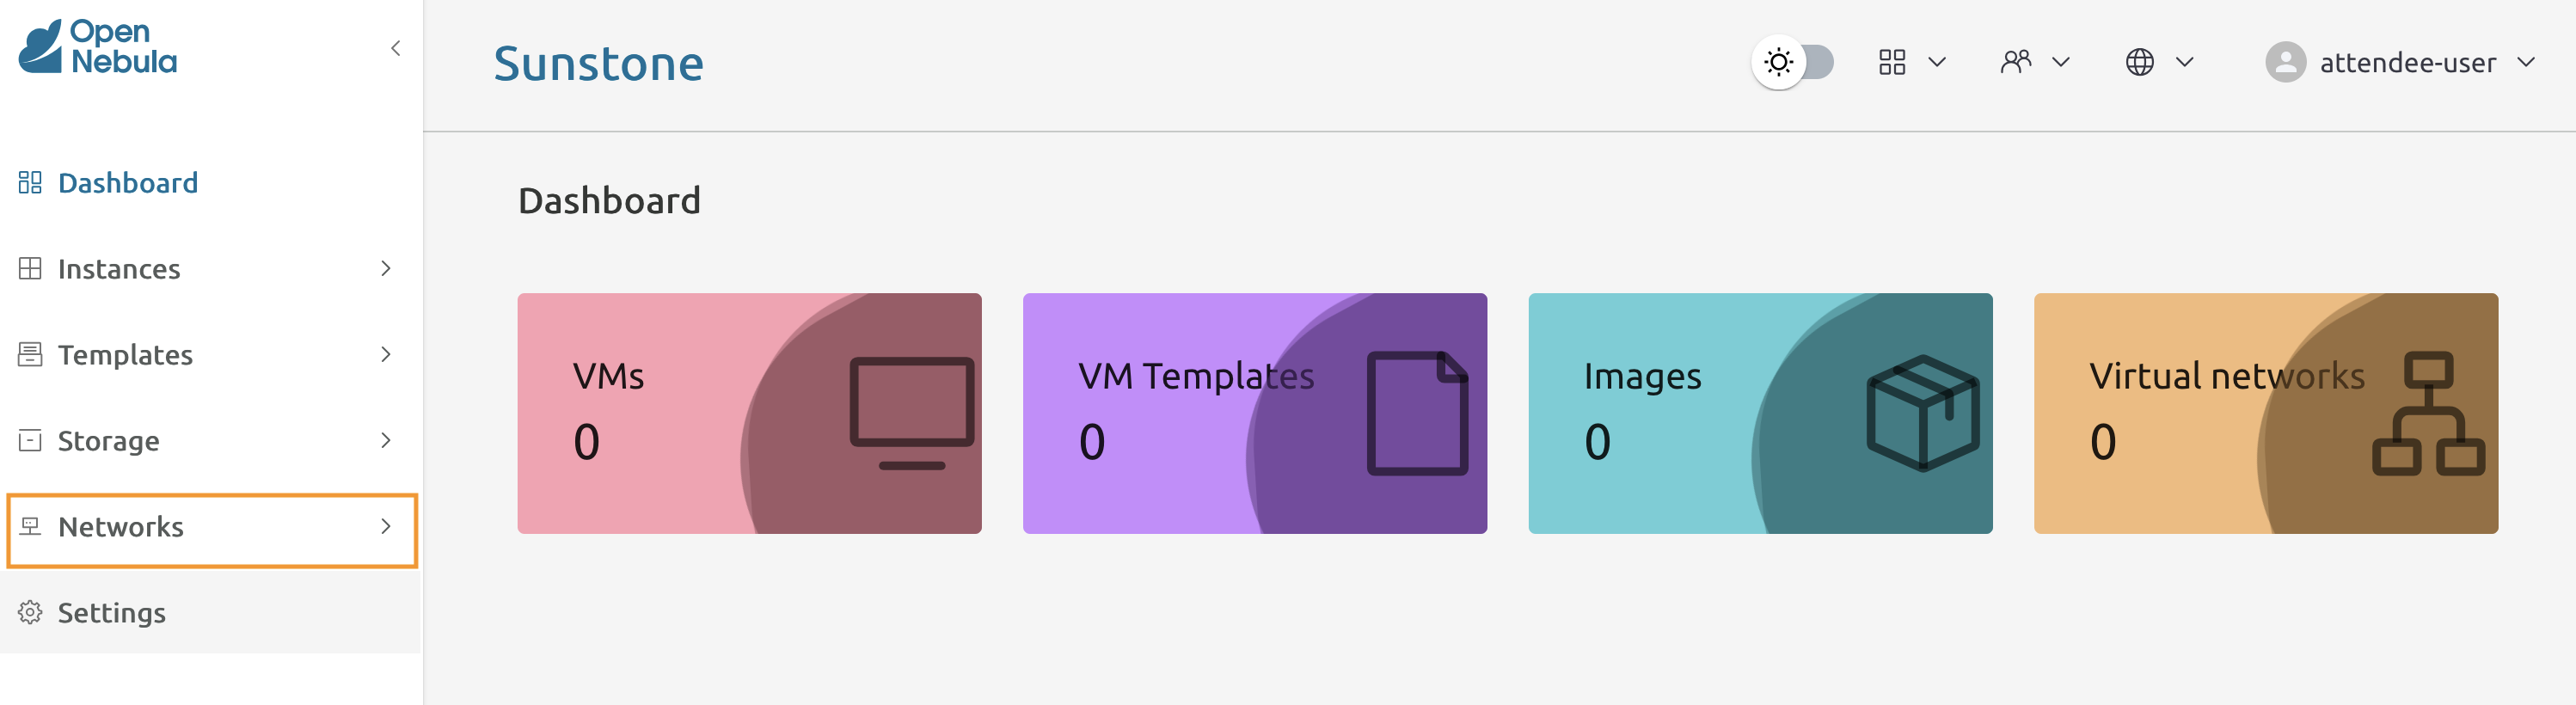
3.1.8
Note that the Network menu item is present!
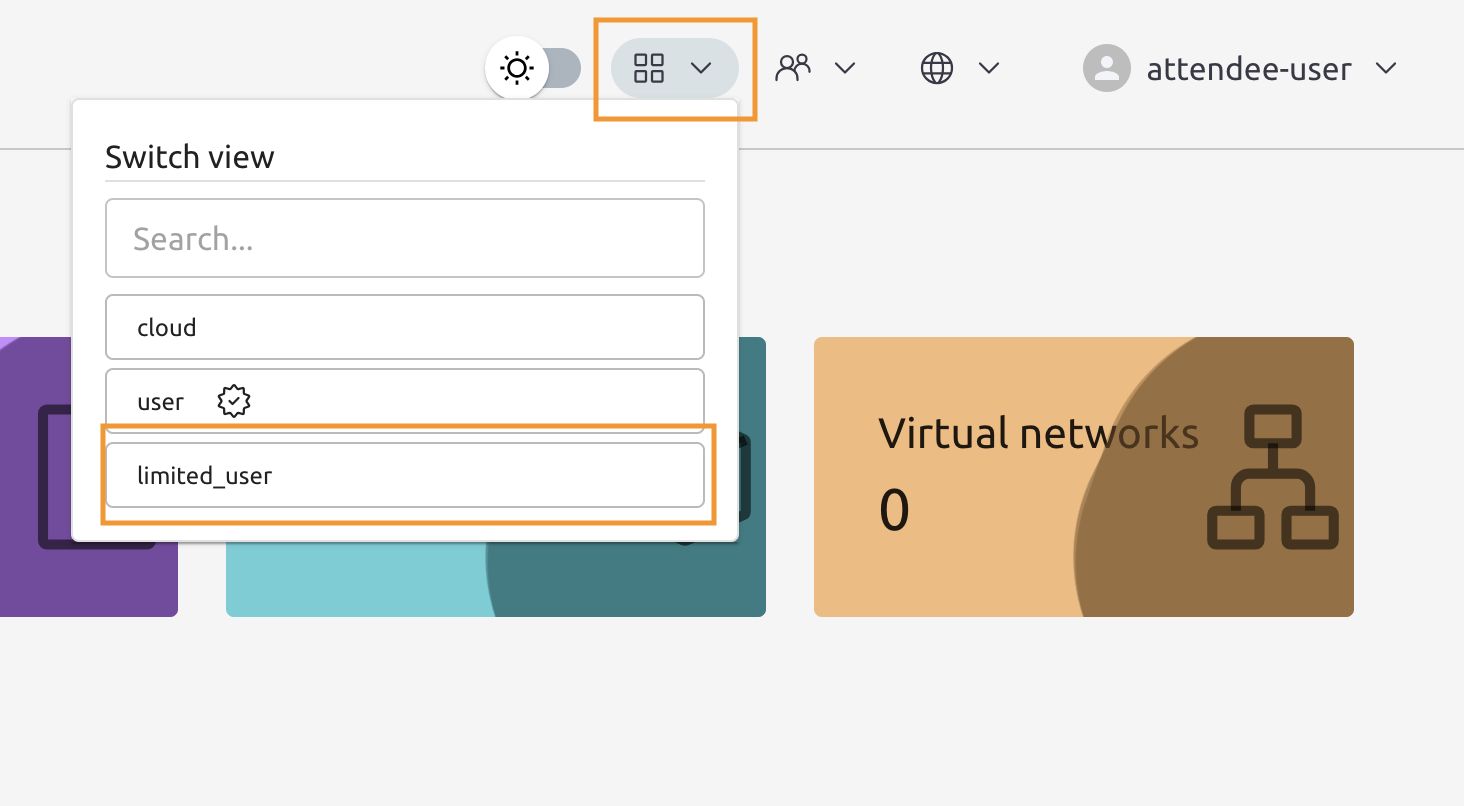
3.1.9
From the view switcher select the limited_user view.
3.1.10
Now pay attendtion to the menu bar. The Network item should disappear.